
Loading...
Loading...
Loading...
Loading...
Loading...
Loading...
Loading...
Loading...
Loading...
Loading...
Loading...
Loading...
Loading...
Loading...
Loading...
Loading...
Loading...
Loading...
Loading...
Loading...
Loading...
Loading...
Loading...
Loading...
Loading...
Loading...
Loading...
Loading...
Loading...
Loading...
Loading...
Loading...
Loading...
Loading...
Loading...
Loading...
Loading...
Loading...
Loading...
Loading...
Loading...
Loading...
Loading...
Loading...
Loading...
Loading...
Loading...
Loading...
Loading...
Loading...
Loading...
Loading...
Loading...
Loading...
Loading...
Loading...
Loading...
Loading...
Loading...
Loading...
Loading...
Loading...
Loading...
Loading...
Loading...
Loading...
Loading...
Loading...
Loading...
Loading...
Loading...
Loading...
Loading...
Loading...
Loading...
Loading...
Loading...
Loading...
Loading...
Loading...
Loading...
Loading...
Loading...
Loading...
Loading...
Loading...
Loading...
Loading...
Loading...
Loading...
Loading...
Loading...
Loading...
Loading...
Loading...
Loading...
Loading...
Loading...
Loading...
GMetri is a no-code browser-based metaverse toolkit - providing the complete web 3.0 infrastructure to create, publish and track your own metaverse.
GMetri helps individuals and businesses create, share and track collaborative metaverse experiences for training, online stores, product showcases, immersive tours, stories and more.
QuickstartTutorialsUse the arrow keys or the joystick you see on your mobile to move around. Click on the products in display to get a detailed Product Card. You can also try purchasing the items to get redirected to their respective pages (though with integrations like Shopify even shopping carts work within the Metaverse).
GMetri excels at creating Digital Twins for training, simulations, virtual facilities, facility tours, product showcases, events, employee onboarding, recruitment to name a few use cases.
Account Creation, Project Listing, First Experience, Deploy
Here's a short video to get you familiar with the GMetri Platform:
Start by creating a free account at https://portal.gmetri.com/register
Login at
The page you see after you log in is the . The portal lists all your experiences.
Click on any project to open the Experience .
Go through the to go through the basics of creating a Metaverse Experience
Go through the other sections in to delve deeper
Step 1: Login and click on "Enter Room". There is no step 2.
Copy this Invite Link, and share it with your friends, to have a chat with them in the metaverse. Use "Join Call" to start an audio session.
This is where the real fun begins!
For a quick intro to GMetri head over to . Go through to get a lay of the GMetri land.
To get a hand-hold session that goes through both basics and advanced topics of GMetri, .
See you on the other side!
Use wizards to get started with prebuilt GMetri experiences in 5 minutes!
Here's a 17 min session by @NoCodeDevs that takes you through a Wizard to get your first Metaverse experience.
If you don't have a GMetri account already,
Open the wizard you want (use any wizard link below), fill it by uploading assets/images, and submit.
Done!
Wizard links:
Check your email to get the link to your personalized experience with 5 minutes of filling the wizard.
To make further customizations to this experience, access your to find these experiences listed there.
Here's the you can follow to create a collaborative retail metaverse of your own.
Here's the you can follow to create a collaborative event metaverse of your own.
v0.5.5265 / 05 Jan 2024
New rule to show toast notifications
Removed restriction to have an empty action in rules
New rule to register clicks on the SHARE button in product card element
Simplified avatar selection process for all authenticated experiences
Display name will now persist across all deployments with an origanization (if used with authentication)
Fixing experience starting issues when using load from deployment authentication method
Fixed GLB and GLTF file uploads in the editor
v0.5.5697 / 27 Mar 2024
Walking Speed Multiplier: Implemented a walking speed multiplier, allowing users to accelerate the experience by adjusting the walking speed.
Character Element Events: Added two new events to the Character element: "Finishes Speaking" and "Finishes AI Response," facilitating smoother integration of events in interactive storylines involving character elements.
Mobile “Tap to Start” Screen: Introduced a new "Tap to Start" screen on mobile devices to ensure the audiocontext is unlocked, improving user experience.
Multiline Text Input: Enabled multiline text input in various then actions, including "Set to String," "Speak," "Show Notification," and "Replace Screen Reader Text," enhancing flexibility and functionality.
Wider Rule Name Input Boxes: Increased the width of rule name input boxes to accommodate longer rule names, improving visibility and usability.
Autogenerated Variable Table Enhancement: Updated the autogenerated variable table to display variable categories on the Variables Settings page for improved organization and management.
Password Expiry: Implemented password expiry for GMetri editor accounts. Accounts older than a specified period will prompt users to update their passwords for enhanced security.
Reduced Third-party App Usage: Minimized the utilization of third-party applications accessing GMetri data to bolster data security and privacy.
Movement Speeds: Fixed movement speeds for both first-person and third-person modes, providing smoother navigation.
Autogenerated Variable Headers Alignment: Corrected the alignment of autogenerated variable headers for consistency and clarity.
Logic Map Sorting: Ensured correct sorting of logic map rules and when events for better organization and ease of use.
Gyro Permissions
When working in the editor, some experiences require that custom logic be run when certain events occur, since this logic depends on specific use cases, the editor has a script property where a custom javascript can be entered. This script will be executed during the run time (i.e., in the view mode)
Here's an example that uses custom javascript:
This Menu tab is used to control the Menu used to toggle between Scenes.
The menu looks like this:
It appears both in the editor and in the viewer. On the menu tab, you can control if you want this menu enabled or disabled. You can also control if you want any scene to be shown in the menu or not individually.
Player Count Variable Changes: Rectified the issue where changes in player_count_var weren't triggering when events, ensuring proper functionality.
Initial Hidden States of Actionbar Items: Addressed the issue with the initial hidden states of actionbar items for improved consistency and usability.
Enhanced Preview Link Generation: Revised the method for generating preview links to bolster security measures.
Improved Data Encryption: Updated the encryption process for enhanced data security.
Mobile - Walking Straight: Resolved the issue of walking straight on mobile devices using the third-person joystick, ensuring smoother navigation.
Character Element Audio Issue: Fixed an issue related to the Character element audio for improved functionality.
3D Asset Loading Bugs: Addressed several bugs in the loading process of 3D assets utilizing KTX compression, ensuring proper loading and display.
🛠️ Minor UI fixes in Rules top-bar.
🎯 Dragging and dropping in the “Structure” tree is now much smoother.
📈 Slight improvement in project size. Initial load times should be slightly faster.
⏱️ Precision of video, audio, and timer duration rules is now 250 milliseconds.
🤫 Ability to mute all users as the host using a single click.
💾 Editor changes now consistently get saved, with more efficient diffs generation.
🎯 Multiple rules with the same "when" conditions now get triggered as expected.
📱 Action bar no longer covers the joystick and caller options on mobile.
📋 Duplicate and ghost entries in the "Structure" tab no longer form.
📝 Copying and pasting a scene and an element now includes the element in the current scene as expected.
Minimap element (beta)
Support for KTX2 compressed 3D models
OpenAI Assistant support for Character element
Added an additional audio to character element when the character is thinking about an answer
Improvements to VR mode render pipeline
Minimap element (beta)
Adding back TrackJS
Fixed Shopify Plugin
Added variable templating to Embed 3D element
Horizontal alignment fixed for Text element
Locked and hidden properties added to Hotspot element
Fixed bug with sketchfab imports when opened from the properties panel
Removed un-used actions from light element
Minimap element (beta)
Stricter restrictions on File Uploads
Support for controlling Avatar quality
Product card - checkbox for enabling share button
Support for controlling Avatar quality
Product card - on clicking share button copies a link to the clipboard and shows notification
Product card - when a shared link is loaded, the product card appears.
Reduced poly count for zone element
Fixed idle and talking animations for Character element
Fixed PDF Viewer for Popup element
Fixed render order issue for Zone element
Fixed styling issue for Instruction element
Fixed movement controls when shift key is pressed before WASD
Fixed editor sluggishness when using arrow or wasd keys to move around
Restructured Branding section.
New deployments are Live by default
There are new auto-generated variable for tracking the viewer's last name and full name
Users are hidden when they enter the spawn zone
Preventing access to the editor without a valid uuid
Fixed inconsistency with durations on the Deployment Analytics page
Fixed styling issues on Analytics page
Fixed clickability issues with Colliders
Viewer name gets computed correctly for CustomList login
Fixed movement when typing inside chatbox
Fixed the avatar selection screen
Fixed OEmbed URL expansion when using an alias for workspace name
Editor blocked on unsupported browsers
Improved file processing UX.
Added a preview for PDFs.
We now stream Y positions while viewing others' avatars in 3D scenes. (You can now see people jump.)
Added support for mpeg audio files.
Fixed click issue for touchscreen laptops.
Massive performance updates in 3D mode.
Changed defaults for new experiences. Default scene - 3D scene, default camera controls - 3rd Person
On duration matches rule for Audio Element
Fixed keyboard shortcuts when using chat and comments
Fixed Comments for 3D Scenes
Fixed scaling issue for character element between editor and viewer
Fixed popup rendering issue for older experiences
Fixed name templating in emails
Fixed editor crash when user name doesn’t exist
We have removed the left bar, and moved a lot of the functionality to a new bar, paving way for a sleeker UX and faster improvements
Improved Avatar System
A lot more ready to use "My Metaverse Rooms" added
Fixed issue with EmbedHTML and EmbedSCORM element where it makes a unnecessary request to server.
Fixed issue where screen gets locked in mobile phones
My Metaverse Rooms use organization cname if present
Fixed search in Resources Panel
Fixed duplication of deployment for My Metaverse Rooms
Fixed jittery transform control while dragging elements. Sometimes while dragging elements the controls used to disappear
Fixed loading issue for V4 editor
Environment Maps for 3D objects
Upgraded screens for Premium Features
Added Teasers for upcoming features
Simplified billing
Fixed a few issues with links built on older version

v0.5.3429 / 13 Nov 2022
Adaptive Graphics that adjust the graphic details according the hardware device The editor can control the initial value for adaptive graphics between high, low, and adaptive (default).
Ability to select any Custom Environment Maps by selecting an .HDR or image file as the environment map for the whole scene, apart from the default options provided.
Removed mouse jump controls from scene bounds, walls and ceiling.
Collaboration controls displayed above screen-share - so the user can mute/unmute mic while a screen is being shared.
Screenshare section now shows name of the user sharing it.
Ripple animation on the mobile joystick to direct the user’s attention to it. Tooltip added to the joystick.
Lights can now be shown/hidden via Rules.
In Rules, Point To and Change to Scene are now “Viewer” actions instead of Environment and Scene earlier.
Defaults for multiplayer settings call/screenshare/chat are now checked.
Tooltip on top of the mouse jump control now disappears on time.
Scene bounds in certain cases weren’t editable. This is now fixed.
Certain bugs in timezone and date/time selection in “Current Time” rules fixed.
Fixed issue with End Experience rule when current scene and initial scene are same.
v0.5.4972 / 11 Sep 2023
Updated UX for Avatar Selection
New reactions for Players
Introducing a new Brain type: Role Play (can hold conversations given a personality)
Shortcut for deleting elements updated from Ctrl + Delete / Cmd + Delete to Delete
Introducing 10 new talk animations for characters
Performance Monitor to calculate Videos, Audios and GIFs overhead
Improvements in Brain selection UI
General optimisations to reduce RAM usage
Fixed Copy and Paste for elements
Fixed Experience renaming
Popup showing slides in sorted order now
v0.5.3959 / 10 Mar 2023
ReadyPlayerMe Integration for Avatar System
A new and ReadyPlayerMe Plugin for Filemanager. Characters can be imported from ReadyPlayerMe.
Viewer Camera Mode - First Person/Third Person for 3D Scenes. Use to switch between the two.
Branding feature consolidation - is now a Professional tier feature, whereas and are Enterprise tier features.
There is no longer a Starter Plan. Check available plans here:. Older customers who are already on the Starter Plan can continue to remain there.
Preview URLs now start with “preview.gmetri.com/…”
On headset, a persistent overlay is visible to enter into Immersive mode
Actionbar UI improvements
Streamlined UI for menu, hamburger menu on top-right of the page uses only the required amount of space
Avatar heights are in sync between non-immersive and immersive modes
Sideways running issue in 3D scenes in 3rd person view is fixed
WASD keypress on properties/structure doesn’t trigger movement of the user
Toast notifications are shown for all operations correctly
v0.5.3839 / 07 Feb 2023
You can now add a Screenshare element and use it to share your screen with your peers in a 3 dimensional setting
Updated embed code to allow VR mode to work in embeds
Aria-labels added for EmbedHtml elements
Added placer 3d to pano elements
Updated structures for signin signup pages (required for Google SEO)
Handling expired preview links better
Handling editor access errors better
Removed rules from Collider Meshes - appear / disappear doesn’t work on colliders as of now
In the area above the viewport, elements were not draggable. This is now fixed.
v0.5.5015 / 4 Oct 2023
We released the v5 editor in November 2021 and introduced v6 in August 2023. Both of these releases marked major upgrades in terms of the underlying technology and the way we store GMetri projects.
During the transition from v4 to v5, we did not automatically update older projects. Instead, we have continued to support the older v4 format in legacy mode for approximately two years.
Throughout this time, GMetri's feature set has expanded significantly.
We are planning to decommission the v4 editor in the near future. Fortunately, this change will not impact your deployments. This is because, for an extended period, v4 projects have been viewed using the latest viewer. In the viewer we update v4 projects on the fly to the latest version (to v6), without saving them back, to ensure that you can still use the v4 editor, while getting the benefits of our latest viewer.
However please be aware that before the next release, when you access older projects, you will start seeing the new editor instead of the older v4 editor.
Unfocused windows no longer cause audio events to not fire
Updated supported browser versions:
Fixed orientation issues with VR mode
Fixed Point To action in VR mode
Fixed variable templating for Embed 3D element
v0.5.4439 / 16 June 2023
🌐 We've introduced a new element, Embed 3D (beta), that allows you to add web embed codes into the 3D world. This exciting feature opens up a whole new realm of possibilities for your 3D creations!
⏫ Minor Improvements
🎮 We've added a pitch range to 3D scenes for more customization options.
🚫 We've added an option to disable jump for 3D scenes for more control over your 3D environment.
🚫 We've added an option to disable mouse jump at the experience level for a smoother editing experience.
🐞 We've fixed the CTRL/CMD + D shortcut that resulted in infinite movement on 3D scenes for a more controlled viewing experience.
🐞 We've fixed random movement when the Popup element is open and the user presses WASD or arrow keys on 3D scenes for better navigation.
🐞 We've fixed model issues with the latest GLTF spec for improved 3D model rendering.
October 2021 Update (Teaxr v0.5.1379)
Viewer
VR mode supports Point to action
VR mode supports animations during scene transitions
VR mode supports scene offset rotations
Editor
Deprecated: Height from text elements
Deprecated: width/height/depth from cylinder
Improved updates from number/decimal properties
Editor
Gracefully handling all resource failures to remove any unwanted crashes
Fixed errors while adding new text elements
Updates to experience can be viewed correctly in the preview/view links. Experience data/cache gets updated correctly.
Global Variables are shared across all experiences in a workspace. These are helpful if you want to track your users journey across multiple GMetri experiences.
When the user moves from one experience to another in the same workspace, the values in global variables is preserved across experiences
Head over to Settings from the top right menu in your .
Click Add Variable in the Global Variables section
In the Project Editor, go to .
Scroll down to see the Global Variables section. Use the dropdown to add the global variable you want to add.
Read more about Variables here:
v0.5.2383 / 05 May 2022
A major release this time with 3D Scenes
3D Scenes enabled for all users 🥳
Added a new element - Environment (Environments are 3D spaces)
New SignUp and SignIn pages!
Adding scenes now adds relevant elements like lights and pano Improved PointTo algorithm to ensure rotation is always linear
Fixed an issue with invites
Fixed an issue where users were getting logged out of the editor, ensured users always have fresh session tokens
v0.5.3778 / 24 Jan 2023
The Editor now shows the sync status for any changes made - just like Google Docs!
Performance Improvements for the avatar system
Performance improvements for beta features
Improved mobile usability for multiplayer deployments using beta features and 3rd person mode
In case of any network issues - the user is warned in around 30 seconds that changes aren't getting saved
Fixed tooltips on navbar
Misc UI fixes for navbar
Fixed rendering for Date-time picker for current time element in rules
v0.5.5015 / 30 Oct 2023
Updated Signup flow - Added ability to add organization details, reference and purpose
Updated substitute nomenclature to Variants for Image, Audio, Audio TTS and Text elements
Added capability to rules to change view mode
Added CTA to open scene properties in the Structure tree
Restricting conversational brain to an Enterprise only feature.
Fixed order of elements inside groups in rules UI dropdowns
Fixed ability to use delete key for input fields in editor
January 2022 Update (Teaxr v0.5.1839)
Editor
New properties for text element including background color, background opacity, border color, border thickness. Also added ability to upgrade any existing text element to enable all the new properties
A new grow animation option added to all 3d elements.
Editor
Documentation for GMetri Plugin Ecosystem
Elements can be added inside groups directly from the add element UI
Viewer
Viewer
Actionbar element styling fix for devices with smaller resolutions
Capture text element matches text with regex validation correctly
Embed HTML element appears in popup mode when pip is selected to maintain consistency of the UI
The Portal give you an overview of all your experiences
An experience in GMetri is like a file in Photoshop or a project in MovieMaker.
You can see all your experiences in the Portal. To create a new Experience, click on "Create new Experience", type its name and press the arrow next to it.
Click on the experience to edit the experience by opening the Editor
Use the bottom left menu to access more options
Use the bottom left menu on the Experience thumbnail in the Portal to duplicate the experience.
Use the bottom left menu on the Experience thumbnail in the Portal and select "Duplicate To"
Select the Workspace you want to duplicate the Experience into
As the operation might take some time, you will get an email once the duplication is completed
v0.5.3381 / 07 Nov 2022
3D Scenes are now no longer Beta!
Simple Movement Controls for Desktop - now you can right click to move
Sign up pages now look a litte more exciting
Zone actions (via rules) now work even if they were hidden earlier once and then “shown” later (via appear rule)Fixed an issue with USDZ generation for 3D models
Make sure the person you are trying to add as a collaborator is already a team member in your workspace.
Multiple editors can edit an experience at the same time.
To edit and experience, you need to be either an admin of the workspace, OR be added as a collaborator of that experience.
Use this tab to add new collaborators to the experience.
Click on Add Collaborators button under Collaborators section.
Enter email address of a registered user who you want to collaborate with.
Members who are invited to collaborate on an experience will receive an email invitation. Once they accept the invitation, they will be allowed to access and edit the experience.
v0.5.4027 / 16 Mar 2023
Redesigned Publish section for easier sharing
Ability to control camera height for editing in multiple levels - Change camera height from Navbar
Ability to toggle between First Person and Fly controls in the editor from Viewport properties. Use ALT + Q as a shortcut to toggle switch
Better color reproduction for Lights and 3D shapes
Deprecated Geofencing
New metadata “description” added to view links
Fixed issue with DRAG TO MOVE UI appearing over menu
Fixed scrolling issue with menu
Fixed incorrect UI states for AND/OR rules
September 2021 Update (Teaxr v0.5.1224)
Editor version 5 beta released and enabled for partners
Update Viewport controls for editor v5 includes Bounding Box, Orbit mode and Gizmo options
Dynamic loading for rules UI
Videos/Audio/PDF can be uploaded via Media Upload element
Hover action disables built-in bounce animation
Leaderboard and analytics fixes
Project duplication to a different workspace correctly copies all files
Updated preview link for experiences in portal listing page
Use the Settings > Variables page to add/remove Custom Variables, Global Variables and Autogenerated Variables.
Learn more about Variables here:
Variablesv0.5.2753 / 01 July 2022
Environment element now allows user to select any custom file as the environment
Billboarding now supports 3 modes - Y, XY and XYZ
Text chat for Multiplayer.
Spawn zones in 3D scenes. This allows setting the starting position in a 3D Scene.
Multiplayer mode now enabled in all scene types - 360 scene, Orbit scene and 3D scene.
Allowing custom project thumbnail from Settings -> Upload Project thumbnail
Uploaded files in file manager no longer need a refresh to become selectable
More structure and files added to Assets by GMetri Plugins
Fixed green screen color defaults
Fixed horizontal alignment on text elements
Fixed Zone Element’s scaling uniformity
Fixed hotspots compatibility with VR mode and flickering issues
August 2021 Update (Teaxr v0.5.876)
While building an experience you can keep previewing it to check how viewers will experience it. Opening a preview always directly opens the scene that you were on in the editor.
Note that these preview links are meant for previewing the experience only. The preview links fast - you should keep opening new preview tabs by every time you want to preview.
Also read:
Use the tour mode to start a guided tour which starts after a few seconds of inactivity. The guided tour slowly rotates the scenes that the viewer is in and then transitions through all the scenes in the list below, one by one.
After enabling tour mode, you may select the scenes and the order in which to show them.
Here's an example tour mode:
You can access your experience settings using the Settings (gear) icon on the top-bar.
Check the sub-pages to know more about each individual section.
A Scene in GMetri is like a slide in a presentation or a chapter of a book. Scenes break-up an experience into many parts.
Add a Scene by using the + icon in the top bar
Zones are interactive areas that can be used for a variety of purposes.
When you add a new 3D Scene, there's always a default Zone that gets added - which is the spawn zone. A Spawn Zone controls where viewers will spawn when they enter the 3D Scene.
To include a 'Zone' in your experience, navigate to the 3D elements section and click the '+' icon. Then, select the 'Zone' element and add it to your experience.
🐞 We've fixed an issue with gender-specific animations from Ready Player Me for more accurate animations.
🔄 We've changed the defaults for the character element height for better character representation.
Viewer
Deprecated: Scene pitch correction. All scene pitch correction in scene gets converted into point to rules automatically.
Correct updates to deployment authentication
Viewer
Disallow rotation using mouse scroll when gyro lock is enabled in a scene
Fixed text input in comments to clear text on submit and prevent text clipping
Portal
Fixed new project creation flow.
Viewer performance optimizations to reduce network calls overhead
Portal
Fixed views and viewers count on deployment analytics page
Design fix for mobile devices for Popup and Embed HTML
Instruction element now shows the full length of the video
Fixing sketchfab imports
Media upload element allows uploading videos
"Shared" Property 🤝: Rules can now be marked as "Shared". When activated, these rules apply to everyone in the same room, enhancing multiplayer interactions.
Enhanced on_var_change 🔄: This function has been updated to work with Shared Rules, enabling real-time variable syncing across all players. You can now set a rule “When variableA changes, variableA should capture data”. If this is a shared rule, the value of variableA will be synced with all players.
Variable Substitution in When Conditions 📊: You can now use variable substitution in the "When" part of rules, allowing for dynamic comparisons. For example, set conditions like "When a > {{b}}".
New Variables: Introducing two auto-generated variables for player counts:
player_count_var 🧑🤝🧑: Tracks the number of players in your current game instance.
player_count_all_var 🌐: Shows the total number of players in the entire game room.
"Remember Me" Option ✅: Users can now choose to be remembered after logging in, streamlining access for subsequent sessions. This feature is available for "Social" logins and other methods configured in Viewer Groups.
Install as PWA 🚀: GMetri experiences can now be installed as Progressive Web Apps (PWAs) on most modern browsers, offering a more app-like experience directly from your browser.
Japanese Language Option 🇯🇵 The viewer bubble now supports Japanese fonts also
Faster Avatar Thumbnails⚡ Default avatars selection screen now load more quickly, enhancing the user experience right from the start.
Max Rooms Configuration 🔀 Setting the maximum number of room instances to more than 1 allows for separate moderator rooms. However, setting it to 1 keeps moderators and attendees in the same space, ideal for scenarios like classroom interactions where the teacher needs moderation control.
Resizable Deployment Slug Input ✍️: The input box for deployment section slugs now automatically adjusts its size based on the input length, making it easier to work with longer URLs.
Integrated Passcode in Moderator URL 🔑: The moderator URL now includes the passcode for streamlined access. You have the option to enter the passcode separately if preferred, by removing it from the URL.
SCORM File Extension 📦: Fixed an issue where SCORM files downloaded from the deployment section were missing the .zip extension. Now, files are correctly labeled for easy identification and use.
Collider Visibility Control 🚫: The hide/show functionality now properly applies to collider elements as well, ensuring consistent visibility settings across your project.
Rule Label Correction 🏷️: Corrected the labels for the “When number is between”. “< than” and “> than” now accurately reflect the intended conditions.
Accurate Moderator Link 🔗: The moderator link in the Deployment section now accurately reflects the correct URL, even when the workspace slug has an alias.
Global Variable Protection 🔒: Resolved an issue where the editor allowed unintended modifications to the default values of Global boolean variables.
Improved URL Editing ✏️: Enhanced the functionality of the “cancel” button while editing URLs in the deployment section for a smoother user experience.
Variable Name Editing ✍️: Made improvements in the variables section of the editor to facilitate easier renaming of variables.
Drag-and-Drop Fixes 🖱️: Resolved issues with dragging functionality for Variables, Menu, and TourMode sections under Settings for more intuitive interface interaction.
Single Player Experience Stability 🕹️: Addressed and fixed several errors in Single Player Experience to ensure a smoother experience.
Moderator Reactions 💬: Fixed an issue where reactions from moderators were not being sent to moderator rooms, ensuring that all interactions are properly communicated.
Cleaned Up Editor Scripts 🧹: Removed unnecessary Facebook and segment.io scripts from the editor to streamline performance and user experience.
Editor
Undo-Redo can be accessed using keyboard shortcuts. The list of all keyboard shortcuts is published here
Editor
Adding new element when a group element is selected adds it within the same group
For all elements that have background_source, 3d_model_source, a new option to remove the selected assets
Deprecated text length from viewer form
Editor
On End event added to instructions element. Fires when all stories have finished
FOV change shows up correctly in the 360 environment
Updates to experience can be viewed correctly in the preview/view links. Experience data/cache gets updated correctly.
Correct updates to deployment authentication
Viewer
Fixed billboarding in VR mode
Fixed issue with Product card where it doesn't show 3D Model button
Editor
Updated preferences page in deployment section
Added functionality to download comments from the Publish section
Improved updates from number/decimal properties
Revamped variables and support sections.
Added relevant toasters and loading indicators.
Viewer
For embed HTML element, popup mode becomes full screen on mobile phones
Error screen with refresh button added for experiences with stale login.
Viewer
Fixed inconsistent height for quiz element
Fixed multiple updates in singular option not happening in quiz element
Portal
Fixed analytics page views table UI and functionality.
Fixed geolocate failures
QRMatcher rules show correct entries in rules
Directional light impacts all 3D models correctly
Timer position shows correctly in editor and viewer
Green screen effect on videos
Fixed issue with viewer form not working when there all entries are deleted
Fixed issue inconsistent menu entries when scenes are deleted
Geolocation can now be used from the deployment section
Linked variables with media upload are shown correctly in the “Autogenerated” variables section
Viewer
Multiple fonts for text elements can be used on iOS devices
Fixed fluctuations on mobile devices when using scene range locks
Instructions element skips entries that don’t have any asset selected
Removed viewer state save calls for preview mode
Large viewer state updates now allowed
Portal
Deprecated editor login
Fixed Azure login
Advanced Analytics show more information about per scene analytics
Editor
Renaming viewer form fields also renames the linked variables
General UI improvements
Viewer
Scene names are tracked and can be seen in the advanced analytics section
Control panel doesn’t appear If no items can be shown
Editor
Color Picker crashes fixed
Removed hidden operation for Popup element from toolbar
Allow selection of sprite files for Popup sprite mode
Viewer
Media Upload camera output can be seen correctly on iOS devices
Better scene transitions when 2D elements are involved like Popup/Quiz/Actionbar etc
Viewer
GMetri view links are now oEmbed compatible
Editor
Unlimited deployments for all tiers
Fonts support for timer element
Portal
User profile page now shows an API token that can be used with the plugin system
Editor
Elements can be copy-pasted inside groups
Editor
Fixed issue with sketchfab imports
Fixed issue with deletion of grouped elements
Fixed issue with settings panel for projects migrated from v4
Rules can be added to actionbar items + Files can be selected for actionbar items when element is inside a group
Portal
Fixed advanced analytics links
Deployment analytics and org analytics pages show same data and date range filters
Fixed date range selection on deployment analytics page
Progressive loading of pano elements. Shows a low res image to start the scene and loads the high res pano in the background.
Tour mode speed reduced to avoid dizziness
Viewer analytics now captures and show full URLs (vs. just the path like before)
Added option for custom CNAME for viewer links
Popup element - Increased visibility on sprite slider
Global volume now applies in between scene changes
Org admins can change role of team members to analytics
Fixed End Experience rule
Default GMetri panos are not visible in experiences
Fixed leaderboard filters
Project search is now case insensitive
Fixed zoom controls visibility based on project properties
Fixed Product card and Popup heading issues
Fixed text element render when using templates with urls
QR Matcher now handles special characters (like in URLs) correctly
Editor
Toaster is shown on all updates in the publish section
Rightbar panel design updates
On adding new section in popup, all previous sections auto collapse
Add red bounding box even when elements are locked
Viewer
Deprecated: Scene pitch correction. All scene pitch correction in scene gets converted into point to rules automatically.
Editor
Reset view not working in orbit mode fixed
Dragging in Orbit mode fixed
Changed all docs links on portal and editor
Action bar rules’ 3rd element inconsistency when updated from v4 to v5 fixed
Project property defaults shown correctly
Viewer
Pitch range min value not working fixed
Product card, quiz position fixes
Portal
Fixed new project creation flow.
🖼️ Improved Embed 3D element performance: Smoother rendering and faster loading times for your 3D models.
👤 Improved Avatar Selection for quicker entry into the experience: Jump right into the action with faster access to your chosen experience.
🇯🇵 Japanese Language translations for collaboration controls: Seamless navigation and collaboration with Japanese language support.
🎭 Better random Avatar names: Embrace a new era of diverse and appropriate Avatar names.
🔊 Fixed an issue where audio match rule didn’t work after seek to operation: Audio triggers now function correctly after seek operations.
⌛ Fixed an issue where timer match rule didn’t work after seek to operation: Timers now operate accurately after seek operations.
🔌 Fixed an issue where Agora was loaded even in non-multiplayer deployments, improving loading time.
🖼️ Fixed Element renaming issue when selected from structure panel.
🧠 Fixed issue with renaming AI Brains.
🔍 Fixed issue with rules search when searching by color.
UI Upgrade for editor
Editor:
Improved copy and paste operations for scenes and elements
Updated dynamic event and action selection logic for rules when switching between elements
Updated correct steps for all properties using number inputs
Portal:
Advanced Analytics page access fixed for users with analytics roles
Geolocation and maps in analytics shows correct locations
Login fix for experiences using SCORM packages
Viewer:
Added a few missing emoji icons
Fixed page crashes when navigating quickly between scenes from menu
🚫 We've removed userguiding to streamline the editing process.
🎮 We've added a pitch range for 3D scenes to give you more control over your 3D environment.
👾 We've made cosmetic changes to the AI character element to enhance its visual appeal.
🐞 We've fixed the background clipping for the text element (without background) to ensure a seamless viewing experience.
🔄 We've fixed the point to action while moving between different scene types for smoother transitions.
✅ We've fixed the close button clickability for popups for better user interaction.
🔒 We've fixed the access issue for the leaderboard page while logged out to ensure secure access.
🔄 We've updated the Agora version for improved performance.
🔄 We've updated project calls for both client and server for better synchronization.
Editors can upload upto 6 custom avatars that can be used by viewers
Editors can specify room member and instance limits to control how many viewers can stay in a room simultaneously.
Using host mode you can now kick and mute viewers in the room.
Send notifications to all viewers on a link!
You can now trigger rules based on a time by using "current time" in the rules dropdown.
Firefox support added
Ability to change viewer height from scene properties
Other viewers are hidden when they are within 1.5M of the player
A new analytics page to check all viewer sessions
File Manager: Fixed post processing for 3D models - Thumbnail and USDZ generation
File Manager: Small UI fixes to improve usability
Fixed leaderboard when lead generation is enabled
Made a security fixes to plug an XSS scripting attack vector
Initial implementation of Webhooks.
Logout and offlining option removed from Viewer Preferences
Allow fullscreen and Allow VR are default checked in Viewer Preferences
Preview section shows correct thumbnail on the Rightbar
Better user role management on the portal
A whole lot of bug fixes in the V5 viewer:
Fixed initial rotation on mobile devices with gyro
Fixed reset view on mobile devices
VR mode disabled in unsupported devices
Android edge is now supported without VR functionality
Fixed hover functionality on all 3D elements
Fixed timer pause and timer match events
Media upload and QR matcher are now mobile compatible
Smarter checks for rendering 3D elements
New docs at https://www.gmetri.com/docs/
Editor: User notifications when network gets disconnected while editing an experience
Editor:
Fixed project duplication for v5 projects
has been clicked event added back to the list of events in rules page
Fixed issues with elements inside duplicated groups
Viewer:
Fixed viewer token forwarding issue
A new design for the Popup Element
A new Live analytics section added to Advanced Analytics
Better UI for the Screenshare element
Added relevant tooltips for Collaboration controls for multiplayer
Fixied rotation of avatars between third person and first person views
Fixed inconsistent default avatar model
Fixed menu height for mobile devices
Fixed rules search


Replaced "Cube Collider" with "Collider Volume" elements that allows many shapes like sphere cube, cone, cylinder, sphere, polygon and torus.
Added a new element "Collider Mesh" that allows you to specify a 3D file (glb or gltf) as a collider.
Added a new property "Mouse Jump" to both collider elements that lets you decide if the user should be allowed to jump on the collider using right click or not.
Added a new element "Workspace Logo" that gets replaced with the Workspace Logo (or the Project Logo if you have specified that) depending on which workspace the project is in.
Added a new property to 3D elements - Environment Map Intensity. This can be used to reduce any "burn" in a 3D Model caused by the environment map selected in a scene.
Added Fly Controls to editor. This can be toggled only through the shortcut alt + q as of now.
Added ability to both add and replace users to the Viewer Group type "Custom List".
In Host Mode, in case the number of participants is large, a few of the names go below the page. Now there’s a scrollbar to help with this.
Team Members count is a lot more lenient now in accordance with the latest pricing.
Rules are now tracked even for the rule (“Open URL” on the same tab). Earlier, because of the page switch, the rule didn’t get tracked
In the rules "Open Deployment", fixed overflowing content in the open deployment modal to choose deployments from
Fixed API where on renaming deployment name, the new deployment name should not be a part of deployment list
Better WebGL crash messages
The default rule that was part of a new experience crashed viewer. This is now fixed.
Fixed an issue where in certain cases, audio chat didn't work in scenes with long names


Updated error messages for load from another experience deployment type.


Introducing optimized scene transition type for 360 to 360 scene
Adding Preset avatars for RPM Avatar system for easier and faster access
Adding gendered animations for custom avatar system


Added AI token usage basis month in the billings section.
Added language selection for preview mode


Rotation controls for Meta Quest controllers using the left thumbstick
Button B interactivity for Meta Quest controllers
Token expiry screen when viewer token expires
Typo fixes for branding section
Fixed lighting issue with 3D models
Avatar Rotation in 3rd person mode
Resolved UI issues with screenshare element
Is In List rule for number variable
Fixed issues in Comment Pins


Fixed an issue where the right bar properties tab doesn’t update when switching elements by adding a new element
Fixed scrolling for metadata tab in File manager
Once members have been added as collaborators, they will have access to all features including editing experiences, creating/updating/deleting deployments, and even deleting the experience. Add your collaborators carefully.
Doing this will open up the uploader modal and add all the files and folders for uploading.
Click on the upload button on the bottom right to start the upload process. A progress bar at the bottom tells you the upload status.
Select the element that you want to change the file for, and click on properties tab. Then select the File Select icon.
This opens the File Manager in Selection Mode. You can Selection Mode can be enabled by clicking on the upload icon in the element properties on the rightbar:
You will not be able to select a file if you open the file manager from the left bar, as this opens the "Browsing mode" and not the "Selection mode"
Steps for uploading glb and gltf (zip) models:
GLB - This is usually a single file that contains information for all images, textures and animations used in the 3D model. This file can be uploaded like any other asset such as image, audio or video.
GLTF - This is usually a combination of a few files. A sample gltf 3D model would contain at least 1 .gltf file, 1 or more .bin files and 1 or more image files. To upload and use a GLTF 3D model, simply zip up all the files keeping the folder structure intact, drag and drop on the file manager screen and click the upload button. This zip file will be available for use in a few moments after we are done processing the file.
Collaboration section re-structured for better visibility of available features.
You can now send Notifications to all Viewers live on a particular deployment. This works only if Multiplayer is enabled.
You can select a Project thumbnail via Settings. This is the thumbnail that gets used when sharing the published project (deployment) in social media.
Large number of assets added to the "Assets by GMetri" file manager plugin. This should help you get started faster.
"Hide" enabled for ambient light, and "Hide" and "Lock" enabled for directional light.
Appropriate warnings are now shown while selecting files that don't meet asset recommendations.
Fixed rotation of 3D scenes.
Duration column in Analytics section fixed.
Add various elements such as scenes, images, videos, GIFs, audio, and other multimedia components into your experience.
Rules serve as the fundamental component of interactivity in your experiences.
You can manage/upload your assets from here.
You can share your experience with the your viewers.
You can preview your experience before going Live and sharing it with your viewers from here.
You can adjust/ modify the properties of the currently selected element.
This displays a comprehensive list of all the elements, scenes, and lighting configurations used in your virtual environment.

In the Team Members section click on + Invite and then enter email address of the person you wish to add, to your organization.
An invitation email is sent out to them.
Once accepted, the person you invited gets added as a member of your organization.
To remove a team member, head over to the Settings page and click on remove against a team member in the Team Members section and that team member will no longer have access to any of your organization's experiences.
GMetri users have three tiers of roles:
Admin (The first user of any workspace is the admin of that workspace)
Member
Analytics
If a user joins an already existing organization through an invite, the inviter has the ability to decide the role of that user using the “Team Members” section.
If a user joins an already existing organization (possible only if “auto join” for that workspace was enabled and the email domain matches) using the signup page, he/she is granted the member role after joining the organization. “Auto join” is a setting you see when creating a new workspace while signing up).
An admin can do everything a member or an analytics user can do An admin additionally:
Can access the settings page and change workspace related settings
Has access to edit all experiences, and can add/remove collaborators from any experience
A member can do everything an analytics user can do. A member can additionally:
Create new experiences. When you create a new experience you are automatically a collaborator of that experience.
Any collaborator of an experience can invite more collaborators (who have an admin or member role) to collaborate on that experience. A “collaborator” of an experience is someone who can edit that experience.
Publish projects they are a collaborator of and access analytics data for those experiences
Access and modify “viewer groups” that can be used to restrict access and add authentication to published experiences
Note that members by default cannot edit all experience. Only those experiences to which they have been explicitly added as collaborators can be edited by them.
Analytics
An analytics user can access aggregated analytics of all projects, and also access analytics of individual projects.
By selecting the "Drag" option, you can use your mouse to move the item or element that you wish to relocate within your experience.
This allows you to move objects along the X, Y, and Z axes.
It is possible to modify the position of your element along the X-Y, Y-Z, and X-Z axes.
"Rotating elements" refers to the process of changing the orientation or angle of virtual objects or elements within an experience.
This can be done using tools such as a "rotate" function from 'Viewport properties', which allows you to adjust the rotation of objects around the X, Y, and Z axes.
In addition to the three methods mentioned above, there is an additional option; Transform. This lets you to move or modify your elements and manipulate the axes as desired.
World axes define the spatial orientation of your experience.
They act as a reference point for positioning and manipulating objects within the environment.
The World axes consist of three perpendicular lines, labeled X, Y, and Z. X representing the horizontal axis, Y representing the vertical axis, and Z representing the depth axis.
Local axes define the spatial orientation of your experience.
They act as a reference point for positioning and manipulating the object's position, rotation, and scale. Local axes consist of three perpendicular lines, labeled X, Y, and Z. These lines represent the object's internal coordinate system, which is defined by the object's orientation and pivot point.

By considering the target element as the target, the environment can be rotated in accordance with it.
Environment Map and Selective Bloom in any experience are similar to those in a 3D scene.
To add an orbit scene, click on + in the top bar and select Orbit scene
You then have an Orbit scene added to your experience.
Once you have added an Orbit scene, you can add a 3D object by clicking "+" in the top bar and choosing "3D Model".

To manage the 'Spawn Zone', access the properties panel by selecting the appropriate scene from the right panel. From there, navigate to the 'Spawn Zone' section and choose the desired zone to set as the Spawn zone.
You can add a "Then Rule" to detect when the viewer enters a zone.
By incorporating rules, you have the ability to teleport your viewer to a different zone or scene.
The Control Panel underwent an upgrade. You now get "Fullscreen", "VR mode", "Reset rotation" neatly tucked into it. Comments too have been moved inside. It's also now easier to join calls.
Branding section now contains logo, metadata and support message options
Added ability to purchase credits from the billing page
Performance upgrade for the editor. This was a major internal rewrite of the editor. The editor should now feel "snappier"
Docs links in the editor fixed
Fixed an issue with USDZ generation for 3D models
Fixed miscellaneous crashes when modifying elements like quiz and actionbar
Fixed issues with removing users from the Team Members list
Fixed issues with invalidation of user invites
You can add a video by clicking on the '+' icon in the top bar.
You can choose from the inventory of videos or upload one from your computer.
Read below to know how to select a file to upload a video.
On the right-hand side, there are multiple options available to modify your video element.
You can replace the video, give it a new name, adjust its dimensions, transparency, and proportion, as well as other features.
You can also animate, control the speed and modify other adjustments too, from here.
You can choose from the inventory of image or upload one from your computer.
Read below to know how to select a file to upload an image/ video.
The right panel offers various options for making adjustments. You can modify the image's width, height, scale, and opacity.
You can also animate, control the speed and modify other adjustments too, from here.
The functionalities of Yaw, Reset Rotation, and Allow Zooming in any experience are similar to those in a 3D scene.
Gyro Lock - Enabling this option will lock the gyroscope view of the experience. If the option is not checked, the adjustments to the gyroscope view can be made by adjusting the yaw and pitch ranges.
Environment Map and Selective Bloom in any experience are similar to those in a 3D scene.
You can add a 360 scene by clicking on the '+' icon in the left bar and selecting '360 Scene'.


v0.5.5365 / 23 Jan 2024
🎮 New Multiplayer System Released
We released a new Multiplayer System today, which culminates a long journey of upgrades that started last year. These include the v6 release that made our underlying JSON robust and efficient, and a new multiplayer written in-house, keeping the future in mind so that we aren't limited by multiplayer scale and room limits - even for the foreseeable future.
The new multiplayer system also brings with it a host of improvements and bug fixes.
💡 Developed in-house
🌐 Now supports up to 100 users simultaneously in a single room.
📍 Fixed issues with initial player positions.
🔝 Room capacity increased to 100 for enterprise customers
📚 GMetri SCORM API now supports multiple SCORM elements within the same scene.
🌐 Ability to Show/Hide Groups in the structure tree. (Note: This doesn't work on colliders currently).
📂 Implemented rules to control visibility of entire groups.
⌨ Shift-select multiple items in the Structure tree (Ctrl-select remains).
🖼️ New template for custom Share URL patterns in Product Card elements.
📝 Expanded template variables, fully documented here:
🔐 Direct passcode entry in moderator URL using ?passcode=yyyy.
🔄 Fixed a bug in "Load from another deployment" authentication affecting viewer’s state.
💾 Enhanced memory usage with multiple avatars and scene transitions.
📺 Fixed screen source switching issues in Screenshare Element.
🎲 Addressed multiplayer to single-player downgrades.
v0.5.4866 / 14 Aug 2023
💺Seat element released in beta
⚡ The Rules section now works better (around 5x speed improvement). The list of elements in dropdowns is now ordered according the Structure Panel.
Here's a before vs. after comparison when scrolling the Rules UI:
🧍♂️ Idle animations of Avatars improved.
🧍♀️ There are a few issues in some animations in female avatar. Changes were made to help fix that in the coming few days.
🛠️ Japanese translations in screenshare and multiplayer mode (when "Japanese" is selected as "Viewer UI Language" from Settings.
🛠️ The editor has now transitioned to v6. Most of the issues cased by the v5 to v6 have been resolved.
💾 Code optimizations done to reduce memory usage.
🎯 Copying (ctrl-c, ctrl-v) scenes across projects now also copies variables that were referenced in the rules for that scene. (Note: global variables are not copied over).
February 2022 Update (Teaxr v0.5.1902)
Editor
Users are greeted with an onboarding guide
Rolling out V5 Editor as default editor for new projects and option to upgrade existing v4 projects to v5 projects
A new Resource Panel has been added with lots of useful links and guides
Ability to convert TTS to Audio element
Viewer
Option to "Enable Multiplayer mode" which shows all the connected viewers on view links. Option can be paired with comments and enabled from the publish section
Ability to use "find and replace" rules with string variables
Website
New website rollout
Editor
Scroll position now doesn’t reset when switching between Properties and Structure Tabs
3D Models can be previewed in the File Manager
Editor
Copy-Paste actions fixed for group elements
Fixed File Manager searching for Drew Pano and GMetri Pano Plugins
Correct mimetype added to TTS files
December 2021 Update (Teaxr v0.5.1632)
Portal
Leaderboard analytics enabled for all tiers
Editor
Unlimited deployments for all tiers
Fonts support for timer element
Viewer
New Anchored mode for EmbedHTML element which allows to fix HTML content on top of a target element
Improved login and viewer state management for deployment links
Portal
General improvements to increase responsiveness on analytics pages
Feature restrictions w.r.t to Pricing 2021
For new signups 1st project created is always V5
Editor
Fixed issue with audio element preview and file selection
Fixed issue with AR element file selection
Removed textbox placeholders from unwanted places
Viewport Properties is an editor panel that facilitates the movement and placement of items within your experience.
First person mode allows you move along the plane at a given height using the WASD or the arrow keys. You can control this height from the Top Bar.
In Fly Mode, you can:
Use left click and drag to orbit around a point
Use scroll bar to move forward and backward
Use right click and drag to pan
The transform how you move elements in the editor.
There are 3 transform modes:
Drag: Moves the element across a spherical plane with the camera as the center
Translate: Shows the Transform arrows that allows you to move the element across x, y or z axes or xy, yz or zx planes.
You can refer to the below article to understand how this mode works in a 3D space.
The translate and rotate controls can be relative to one of two available axes - World or Local.
You can change the visibility of the scene boundary using this setting.
You can refer to scene bounds in the below article to understand how they work
This is 3D cuboid frame that encloses an element within the experience. It is used to represent the dimensions and position of an item.
Shown below are examples with and without bounding box visibility.
Sketchfab is a web-based platform that enables users to upload, share, and display 3D models and animations online.
Sketchfab.com makes it easy for anyone to publish and find 3D content online. With a community of millions of creators and published models, they are one of the largest platforms for immersive and interactive 3D content.
Integrating with Sketchfab allows you to search the entire Sketchfab database of 3D assets and bring it right into your own Metaverse!
Once you click on 'File Manager', Sketchfab will become visible to you.
Simply click on 'Sketchfab' and choose 'Explore Sketchfab'.
You will be then redirected to 'Connect Sketchfab'
After clicking on 'Connect Sketchfab', a pop-up will appear like the one below. You can create your account using your email ID and password, or connect via social media logins, Google login, or your company SSO.
If you prefer, you can click on 'Create an account' to set up a new account.
After logging in, you will be redirected to the search page within the file manager.
To find the items or elements you're looking for, simply use the search bar to conduct a search.
After finding the desired item or element, select it and then click on 'Import'.
The model you imported will be saved under My Assets > My Imports > 3D Models (or a similar location based on the type of element you imported).
To add the downloaded item to your experience:
Add a "3D Model" element
Click on its file or "Upload / Choose File"
In the File Manager that opens, navigate to My Assets > My Imports > 3D Models , then simply click on the imported model and then click 'select'
When you add a new 3D Scene, there's a default light setup already present for you.
There are 3 types of lights in GMetri - Ambient, Point and Directional.
Ambient Light is a lighting technique used in an experience to provide an overall level of illumination to a scene or environment. It's a type of indirect lighting that simulates the light that is reflected or scattered from surfaces in a scene, such as walls or objects.
Ambient Light helps to create a more realistic and immersive environment, and it can be adjusted to different levels to change the mood and tone of the scene. It's also useful for providing a base level of illumination when other lighting sources, such as directional or point lights, are not sufficient.
In any experience, ambient light can be set and adjusted using tools and controls provided by the platform or development environment.
Point lights are often used in combination with other lighting techniques, such as ambient light or directional light, to create a more complex and realistic lighting setup. They can be placed in specific locations within a scene or environment to highlight or illuminate certain objects or areas.
In an experience, point lights can be adjusted and customized using tools and controls provided by the platform or development environment. The intensity, color, and range of the light can all be adjusted to achieve the desired effect. Additionally, multiple point lights can be used within a scene to create more complex lighting setups and add depth and dimensionality to the environment.
Directional light is characterized by its constant intensity and parallel light rays that do not diminish with distance. It's particularly useful for creating dynamic and realistic outdoor environments, such as landscapes or cityscapes.
In an experience, directional light can be customized and adjusted using tools and controls provided by the platform or development environment. The color, intensity, and direction of the light can all be modified to achieve the desired effect. Additionally, multiple directional lights can be used within a scene to create more complex lighting setups and add depth and dimensionality to the environment.
The right panel allows you to manage the lighting in your experience. You can choose the lighting type, color, intensity, and target object from this panel.
You can add a light to your experience by adding an element and choosing the 'Light' option under 3D elements.
Here's an example of how the point light, directional light works. Walk towards the element Sphere and Cube to read through what they do.
An experience will be set with a default set of lighting which will include ambient light.
In case you want to collect any information from the viewer in your Metaverse. You can use this section to show a form to collect data from them.
This can be used for various purposes including training, registration, webinars, events etc. It allows viewers to enter a few details before entering your experience.
This can be set up from the “Settings > Lead Generation” page as shown below
The viewer is presented with a form like this when opening the deployment:
Clicking on "Required" ensure that that question isn't skippable
Clicking on Viewer Identifiers is useful if you want to store this response in the variable.

Testing experiences designed for Headsets in Desktop Browsers using WebXR Emulator
During the creation process of a headset-based experience, testing the workings in a desktop-based environment is often easier. The design principles for headset experience and desktop experiences differ at times due to certain limitations on headsets.
There is an easy way to test headset-based experiences on desktop devices.
This is ONLY for testing purposes. Experiences should be tested on headset before final deployment.
Search now works in Rules’ dropdowns
Element/Scene address can now be copied from the Properties Panel toolbar
Text alignment properties now work consistently between the editor and viewer
Color picker in the right bar now picks up correct colors
Viewer
Improved error handling and error reporting
Fixed billboarding for Oculus Quest 1
Editor
Volume option can be enabled from preferences
Instructions element renamed to Stories
Fixed dropdown displays for boolean variables
Viewer
Actionbar UI fixed for device having < 360px of height in landscape mode
Fixed issue with whitespace on iOS devices
Fixed issue with Viewer Form data save
Fixed dropdown styling on shopping card
Portal
Back to Experience links fixed on analytics page
Fixed google login
Actionbar notch now shows a contrasting color to the background
Full support for Macbook touchpad in V5 viewer
Ability to delete and update org logo from the settings page
UI fixes on V5 screens
Duplicate To dropdown in portal is now searchable. Search can be done on org slug or org name
Removed option to Import and select for File manager plugins (sketchfab/flickr/GMetri panos/Drew panos)
V5 deployment links can be accessed from publish section on the editor
Reset View button can be enabled/disabled from editor
UX changed on deployment slug renames when there are clashing deployments with same slug. User sees a toaster and the changes are reverted
A whole lot of bug fixes in the V5 viewer:
Hover events will now works correctly for 0 secs durations
All Viewer Screens (Leadgen, Language, VR instructions etc) work seamlessly on mobile devices
Actionbar variations on all devices (mobile/tablet/desktop) work as expected
Fixed crashing Popups with 3d Models and AR elements on iOS devices
Capture text no longer allows itself to be submitted with an empty string
Media Upload UI fixed
Fixed timer seek_to and on_end events
Fixed scrolling issue on viewer screens for V5 viewer
Fixed Custom list login page for V5 Viewer
Enforce landscape screen shows a better graphic
Fixed orbit controls clicks on mobile devices
Mouse dragging works during scene transitions
GMetri watermark is shown if whitelabel is disabled
Also,
Fixed team invite flow on portal
Automatically adding new scenes to menu if auto add new scene to menu property is checked on settings screen inside editor
Non-live deployments are blocked from V5 viewer
Fixed contact Drew page link


Rotate: Shows the Rotation controls that allow you to rotate the element across x, y or z axes.


🎙️ Combined host and broadcast modes into a 'Moderator' feature, in line with other chat systems.
🏷️ User display names are now retained across sessions.
🚶♂️ Enhanced avatar movement for smoother walking. (better interpolation).
🚀 Improved performance with multiple avatars.
🔔 More effective error notifications.
🔄 Corrected erratic avatar scaling when changing scenes.
🗨️ Fixed the order of comments.


🎋 The right bar Structure Panel tree now works slightly better during drag-drop operations.
🎼 A new property "Background" added to Audio elements. Checking "Background" on an audio element loads it differently (using html5 audio). Background audios:
Take lesser memory (important if you are building for iOS)
Have a limitation on iOS that they can't perform volume changes using rules, and only work at volume 100% (so bake in the low volume into the audio in case you want lower volume)
📋 Duplicating large projects across workspaces no longer fails. There was a log limit that was being reached for large projects.
🛠️ Rules for audios used to get applied on audios twice. This had no impact on functioning, but used up more memory.
📝 Two experimental flags:
use_html5_audio=true: html5 is a new internal audio format for GMetri that uses lesser memory. It has a limitation that it's volume can't be anything other than full (100) and its volume can't be changed by rules. All audios that have 100 volume and don't have any volume rules on them automatically become html5 audios when this flag is passed.
ios_mute_videos=true: Mutes all videos & removes mute/unmute rules. iOS automatically pauses some GMetri experiences containing audios and videos. This helps prevent that by muting all videos & removing mute/unmute rules.


Upon adding an element (360Scene, Orbit Scene, 3D Scene), you will be automatically redirected to "Structure" on the right bar of your deployment.
To select a file, navigate to Pano image > Properties > Upload / Choose file.
It will then redirect you to Files Manager > Plugins > Folders > Files
Click on any of the assets from Plugins tab to Explore the options.
You will then be redirected to the assets from the plugin you have chosen. There are folders that provide various options to add 3D models, Audio, GIF, Greenscreen videos, Images, Pano Images, Pano videos and videos.
Navigate to Images > Files > Select the image > Import
Once you have imported the file, you will see a pop as below
You can now go back to the deployment and choose Upload/ Choose file > File Manager > My Assets > Folders > My Imports > Images >Files > Choose the image and click "Select"
By clicking the "Upload" on the right side bar of your deployment, you can add the files from your computer.
The pop-up box will let you drag and drop or browse files from your computer.
The selected file then will be available for you to upload.
You can then go to File Manager > Files > Select
🔊 Added a “matches duration” event for Audio TTS element.
🎭 Animations are now applied to compatible Characters selected even from outside of Ready Player Me.
📚 Updated UI used to create and add files to a Character element's Brain.
🆘 Better help options in the top bar of the Portal. More visible help icons on the Editor top bar.
📁 You can now select Character files from the File Manager for custom avatars.
🧑🎨 Added a configure avatar link in the deployment page (takes you to avatar preferences), and a few UI improvements.
🖼️ Better icons and thumbnails for Screenshare, Zone, Seat, and Embed3d in the “Add Element” page.
📝 Removed cursor instruction for third-person view (as they aren't needed there). Also, we now show instructions when scene changes from 360 to 3D.
🌐 The optimization that happens to a project while viewing a link - which causes dormant scenes to be removed from it, is no longer applied while previewing the project. This is because the editor might be working on a project that is currently inaccessible but might later link it into the project.
🇯🇵 Translation updates: Capture Input element's copy for Japanese.
🔄 When a browser tab with a GMetri view link was duplicated, the session id used to get duplicated - and viewer updates used to get overwritten. This is now fixed.
➕ Deleting an element and then trying to add a new element without selecting anything from the Structure Panel used to fail. This is now fixed.
📝 Entering text in input boxes should no longer moves the camera. This issue used to sometimes bring the camera down to ground level (because of the “e” reduce camera height shortcut). Fixed!
🧘♂️ The input box for camera height no longer loses focus while modifying it.
📊 Fixed viewer sessions table UI in analytics. It wasn’t being rendered correctly in case there a large number of columns as a result of a large number of variables.
📈 In certain cases, the analytics page used to show errors and the page refused to render. This is now fixed.
🎮 Controller movement fixes for VR mode on headset devices.🎉
📷 Fixed camera height and name bubble position while sitting.
🔁 Reset rotation property wasn’t being applied for Third person mode. This is now fixed.

You can activate Avatars within your deployment settings and choose the most appropriate option based on your preferences.
During the preview of the experience prior to going live, you can incorporate Avatars. You can choose from a variety of Avatar systems based on your interests.
You can choose from several Avatar systems to suit your needs based on the type of experience you are building.
This system offers two choices: Basic and Ready Player Me. The Basic Avatar is the default cone Avatar included in Gmetri. Ready Player Me is a third-party platform that enables you to create a personalized Avatar by either uploading a picture or selecting one from the Gmetri Assets.
Check the corresponding viewer section here:
This system only provides basic cone-shaped Avatars that are pre-installed in Gmetri.
This system offers two options: Basic and Custom. By selecting the Custom Avatars option, you can upload a custom Avatar from your computer. Click on 'Add Avatar', select the file, and you will be directed to the file manager where you can upload your custom Avatar.
You can add up to 6 custom Avatars in any experience.
This system does not include any Avatars.
You can choose between two camera preferences, first person or third person, when setting up a 3D scene. You can create an Avatar and display your digital representation to others.
With the first person mode, you can view the experience from the editor's perspective. On the other hand, the third person mode lets you see yourself within the Avatar that you have constructed.
You can check how a viewer perceives these modes here:
OR
Follow the steps listed below:
Download the package file from here: https://s.vrgmetri.com/gb-web/dev/WebXR-emulator-extension.crx
Navigate to chrome://extensions on your browser
Enable Developer Mode from the top right on your screen
Drag-n-Drop the downloaded file on this page
In the prompt that appears, click Add extension button
Open developer tools on chrome using shortcut CTRL/CMD + I
Select WebXR option from the tabs
Select one of the devices from the dropdown
Click on the Enter VR button from the hamburger menu (on top-right) from the GMetriXR experience and enter VR mode on your desktop
Editor
General UI updates for properties and structure panels
Viewer
An error message is displayed to the viewers when there is network disconnection
Editor
Improved element/scene deletion resolution for multiplayer system
Timer element durations are correctly displayed in the editor
Nested elements within groups can be selected from Structure Panel
Pivot point support added for 3D Shapes (Polygon/Cube/Sphere/Cone/Torus/Cylinder)
Rules delays show correct values in the rules panel
UI updates for Capture Input, Share and Product card elements
Fixed element renaming from properties panel
Increased text box character limit to 5000 characters
Fixed Rules UI Logic map loading states
Popup element - Added correct restrictions for selecting files from File Manager
Fixed rules updates when elements are deleted from the scene
Viewer
Pivot point support added for 3D Shapes (Polygon/Cube/Sphere/Cone/Torus/Cylinder)
Quiz element shows at least 4 items without a scrollbar.
Quiz element - Fixed background
Portal
Docs links updated across the platform
We reworked how the preview button works at the top right corner of the editor. The Preview popup now shows options to open the preview in new tab, scan a QR code or go to deployments to publish the experience
New display options have been added to the SCORM element - Fullscreen, Fullscreen without close. The SCORM element allows you to embed SCORM modules within a GMetri experience.
Email verification screen is shown when a user’s email isn’t verified
Fixed workspace logo updates
Thumbnails are correctly generated whenever projects are duplicated
Fixed an issue with SCORM files processing
Correct error messages are shown in preview links whenever the preview session expires (15mins)


Make the metaverse truly your own by utilizing the branding section.
You have several options to brand your experience.
To remove the "Powered By GMetri" splash screen, use this option.
A watermark appearing in the bottom left corner of your experience is displayed to the viewer. This watermark can be removed by checking the relevant checkbox.
Use the 'Custom Loader' option to update your organizational logo.
This logo gets used in the scene loader.
Click "Choose file" to select the logo from the file manager if it's already uploaded.
This message is displayed in case of errors and can be customized and updated as desired.
To enhance the accessibility of your experience, you can create custom metadata. The title and description can be personalized to your specifications.
You can select a thumbnail by clicking "Choose file," which will be displayed when you share your deployment with a viewer.
Tags aid in search engine optimization. Adding multiple tags can increase the visibility of your experience.
Colliders are structures that prevent viewers from walking through a space.
There are three types of colliders - Scene Bounds, Collider Volume, Collider Mesh
Scene Bound is the boundary of your scene. Every place that you want the viewer to visit should be within the Scene Bounds.
In the editor, scene bounds are visible as a grid and can be toggled from the Viewport Properties. Scene bounds are only visible in the editor - you can't see them in the deployed link.
To modify the Scene bounds of your scene, go to the 'Structure' option and select 'Scene'. Then, you can adjust the X, Y, and Z axis ranges to make the necessary changes.
Here's an example experience for Scene Bound. The scene bounds prevent you from going near the windows.
A Collider Volume is an invisible box/sphere/cone/volume that objects will rest on top of. Without colliders, viewers will fall through floors and go through walls and benches. The position, shape and dimensions of this volume can be adjusted from the properties panel.
In view, the collider box elements are represented as invisible cubes with which the players will collide and not walk through.
Enhance your experience by incorporating a 3D object that has collision capabilities. You can either upload your own customized 3D model or choose one from our pre-installed libraries.
Here's an example of how a collider works on an experience:

3D Scenes allow viewers/players to roam freely within a space using WASD and Arrow keys [← → ↑ ↓]. This is similar to walking, visiting and interacting with different parts of a room. You can also jump using the SPACE key on desktop devices.
The properties panel in a 3D scene provides multiple options to adjust an element or an item in an experience.
Quiz element - Correct scores shown when quiz failed
Media element - Added correct restrictions for selecting files from device storage
Zoom disabling fixed for Android/iOS devices
Unsupported Browser warning added for firefox


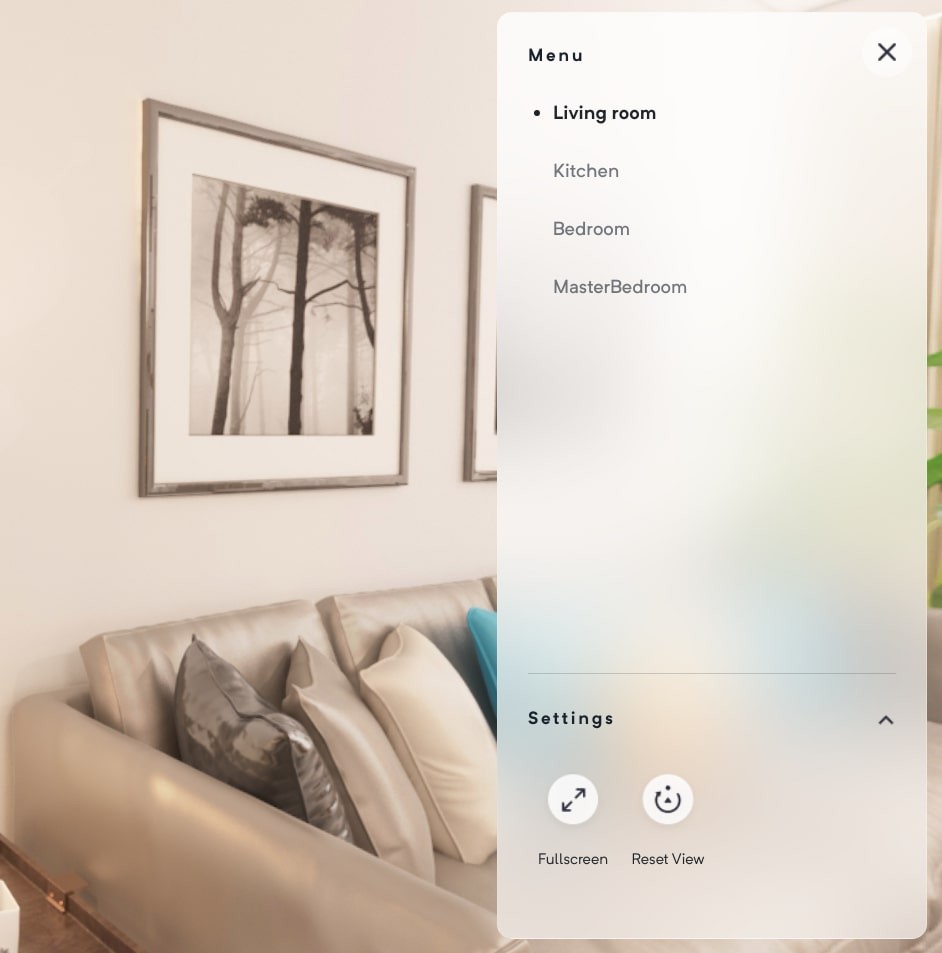
Yaw - It refers to the rotation of a virtual camera around its vertical axis. It is typically used to control the left and right movement of the camera, allowing the user to look around the experience
Reset Rotation - By selecting this option, the user can reset the camera to its default position if the scene in an experience is set at a specific angle. This feature is especially useful in experiences with multiple scenes, as it allows the user to easily reset the camera's position in each scene.
Allow Zooming - This will allow your viewers to control the zoom function for your experience.
Enable Collisions - When Enable Collisions is turned on, virtual objects can collide with each other, resulting in realistic responses such as bouncing or sliding off each other.
Viewer Height - This refers to the height from which a viewer will observe the experience. Viewer height feature can be accessed on desktop and laptop devices, but unavailable for VR.
Spawn Zone - It is a starting point for new users entering an experience. It is a designated area within an experience where avatars or objects are initially placed when they are created. From the drop-down menu, you can select a zone of your choice and designate it as a Spawn zone.
Bounds - From this section, you can make modifications or adjustments to the bounds of the scene.
Environment Map - You can select different types of environment maps from the drop down.
Selective Bloom - Selective bloom is a visual effect in an experience that highlights certain areas of the virtual environment with a glowing or blooming effect.
From the editor, add a new 3D scene by going to Add Element > Scene > 3D Scene. This also inserts a few default elements that are helpful in scene setup.
Pano - A background for the entire scene
Environment - A 3D model that will serve as the space for our scene. This can be replaced by selecting another 3D model from the file manager and adjusting positioning and scale to match life-size scale
Zone - A spawn zone from where all the player will enter this scene. This can be moved around the scene to enable players entering the room from different locations.
Lights - A default light setup to make the scene look good.
To add a new collider, add a new Collider Volume element.
Align the element with one of the walls in the middle and adjust the scale.
From the Scene Properties, adjust the `Scene Bounds` to confine player movement within a space. This is automatically configured for the default environment that comes with every new 3D scene.
Your digital representation in the Metaverse is called an Avatar. Avatar System
You can control the spaces where a user walks using colliders. Colliders
Zones allow you to define interactive areas in a scene. Zones
Control the illumination of your Scene using lights. Lights
To collaborate with other people in your metaverse, you can use multiplayer mode. Multiplayer
Control how you move in the editor. Camera Mode


Keyboard Shortcuts for the GMetri Editor
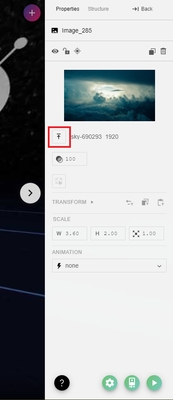
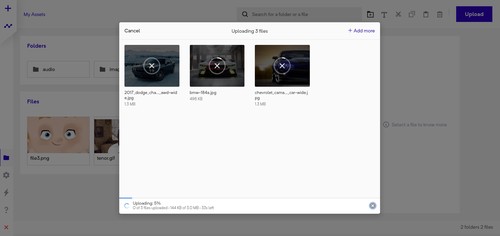
To access your Preferences settings, you can click on the Settings icon located on the top-bar.
Let's explore each of the options on the Preferences settings page below.
The "Initial Scene" refers to the scene that starts first when a viewer launches your experience. This setting is particularly useful when you have multiple scenes in your experience and want to make sure that a specific scene is shown first.
Elements are the basic blocks you use to build an experience. Use the Add (+) icon to add elements.
You can check all elements added to your scene in the Structure Panel
The unit used in GMetri for 3D placement is meters.
` (backtick)
` (backtick)
Fly Controls
alt + q
option + q
Open Rules Panel
ctrl + space
cmd + space
Delete Element / Scene
ctrl + del
cmd + delete
Hide Element
ctrl + h
cmd + h
Duplicate Element / Scene
ctrl + d
cmd + d
Cycle Through Controls
ctrl + q
cmd + q
Zoom In
ctrl + ]
cmd + ]
Zoom Out
ctrl + [
cmd + [
Zoom Reset
ctrl + 0
cmd + 0
Move
←, ↑, ↓, → OR w, a, s, d
Camera Height Up/Down
q, e
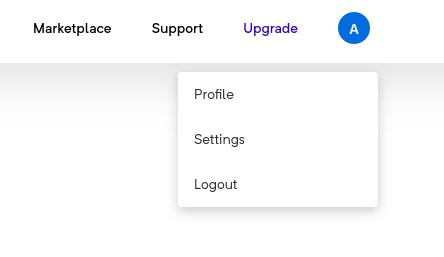


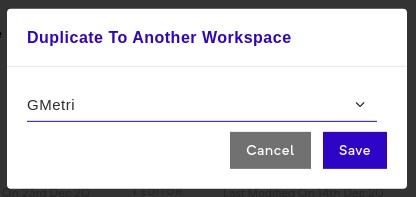


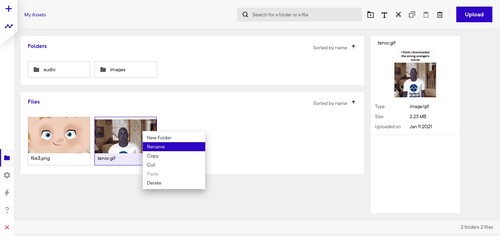
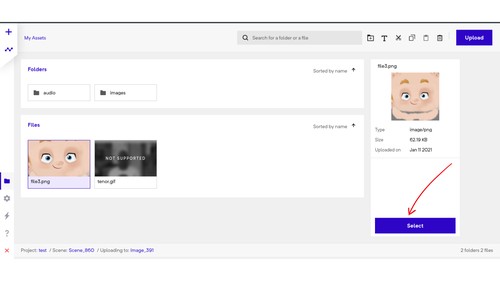
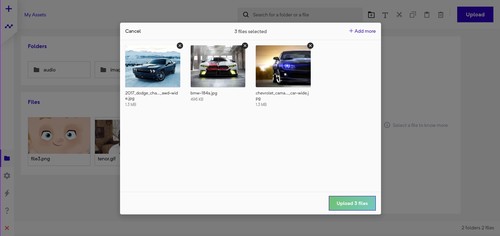
This setting controls the field of view, which refers to the extent of the observable environment that is seen at any given moment in your experience.
The default value is typically set to 75 degrees and in most cases, it is not necessary to change it.
If you are targeting low-end devices, you can set the Graphics to "Adaptive".
Learn more about the Viewer Camera Preference here:
If this is checked, the rules applied to the experience will be tracked automatically through active analytics tracking.
If this is checked, the experience will show navigation instructions for 360 scenes, to the viewer.
If this is checked, "Start" button will appear for the viewer to enter the experience.
If this is checked, the experience will show navigation instructions for 3D scenes, to the viewer.
You can add a description that will appear below the "Click to Start" button for the viewer.
This controls the visibility of the VR mode button, if the hardware supports it.
This controls the Fullscreen button.
When the user clicks this button, the scene will realign to the initial view.
Enabling this option will control the visibility of the volume button.
You can enable gyroscope view according to the viewer's position and perspective in real-time based on the movement of their device, creating an immersive and interactive experience.
Checking this option, controls whether a browser compatibility check will be performed.
When this option is enabled, and you use a browser that's not supported, you get the following blocker screen.
Checking this box will allow your experience to be viewed in landscape mode if it is designed to be viewed in that orientation.


Universal Elements work in VR Mode also
Image 360
Video 360
Also, check Audio Optimizations.
3D Model
Polygon
Cube
Sphere
Cone
Torus
Cylinder
Beyond this point, the elements you add to the scene don't automatically show up in the editor. They only show in the Structure Panel.
For most such elements in order to use them, you need to add a rule that says
when <something happens> then <Element> should appear
All elements below (except Score and Timer) are elements that work only in the browser mode and Not in VR Mode. If you are designing for VR, restrict yourself to the elements above (along with Score and Timer).
AR
QR Browser
QR Matcher
Score
Quiz
Capture Input
Media Upload
Pop-up
Product Card
Story
Embed HTML. (Check EmbedHTML Snippets)
Share


Personalized Avatars with Ready Player Me integration
Screen Sharing - in 3D
Voice Chat with others in the Metaverse, like in Zoom/Teams or GMeet
Post feedback on 360 Panoramas
Send notifications to everyone who is in a deployment
Text Chat with everyone in the same space
Communicate with your team using Emojis
Toggle between first and third person views
Manager your assets on the cloud
REALTIME EDITING
See changes from your teammates real-time Google Docs style
Create logic using No-Code sentence based Rules engine
Create Speech Audio by entering text
Embed HTML pages as part of the experience
Store progress data, and add logic, calculate formulas
Introduce randomness in games
Selectively make videos transparent
3D MODELS
Add 3D Models directly from your computer, or use the SketchFab plugin to import models
MY METAVERSE ROOMS
Use ready-made spaces as a starting point for your experiences
PRODUCT CARD
Product Card pop-outs for showcasing your products
CAMERA CONTROLS
Toggle between first person and fly controls
Combine 3D Scenes, 360 Scenes and Orbit Scene into a single experience
Add images/videos/PDFs etc
Keep previewing your experience while building it
VR Mode, Gyroscope, Zoom controls, Volume controls
Plug your Shopify or WooCommerce accounts into the Metaverse
A powerful SDK for deeper integration using Webhooks and APIs
WEBGL 2 SUPPORT
GMetri uses the most up to date version of the WebGL API and is able to drop back to WebGL 1 when required
PHYSICALLY BASED RENDERING (PBR)
Realistic rendering using the latest techniques for 3D Models
HDR GRAPHICS PIPELINE
Support for the latest WebXR standards to generate room-scale and mobile XR experiences
WEBXR SUPPORT
HDR pipeline: automatic gamma-correction, support for HDR cubemaps
ANIMATIONS
Support for animation on your models
ENVIRONMENT MAPS
Live-like reflections on 3D models for that extra layer of realism
SELECTIVE BLOOM
Ability to add a glow effect on 3D Models
A special mode to cycle across all 360 Panoramas automatically
A plethora of authentication options ranging from Public, Token, Custom List, Password based
Enterprise login methods for Google, Azure, SAML based SSO
Publish your experience as a SCORM 1.2 or SCORM 2004 module
Publish your experience on the web with a single click
GMetri experiences work everywhere - as they run on your browser.
Score based leaderboard out of the box
See views over time in the analytics dashboard
Check time spent on individual scenes
REALTIME SCENE DASHBOARD
Check real-time which user is at what Scene
Track location of each of your viewer and get a density map on your dashboard
COMPLETION STATUS
Check which rules get triggered by which User


