Shopify Integration
Shopify Integration
This tutorial will demonstrate how to integrate a Shopify Storefront within a GMetri experience.
Prerequisites
There are a few steps that are required to enable Shopify Storefront API access on your shopify account.
Login to you Shopify account using the admin account.
From your Shopify admin, click Settings > Apps and sales channels.
Click Develop apps.
Click
Create an appbutton on the top right and enter a friendly name.Select the app created in the previous step and click
API Credentialstab.Click API credentials.
API credentials
On the API credentials page,
Click on
Configure Storefront API ScopesCheck all options available and save. These permissions allow GMetri experiences to pull information about products and manage cart and checkout sessions.
Now click on
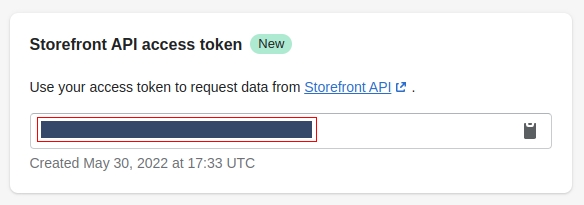
Install appbutton and accept the terms and conditions.Note down the API access key generated, this will be required later.
Domain name
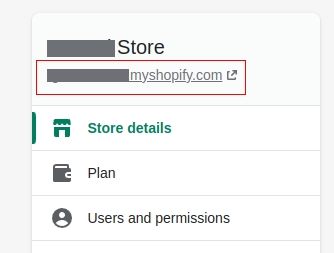
Shopify creates a unique domain name for each of the stores created on their platform. The domain name is required in conjunction with the API credentials to enable a successful integration.
From your Shopify admin, click Settings
Your domain name will be printed on the top left of the page. Note it down for later.
Getting the product SKU
To get a product's SKU
From your Shopify admin, click Products > Select a product
Note the URL in your browser window. The product SKU is the last part of the address like so:
If the URL in address bar is:
https://my-store.myshopify.com/admin/products/7309350764729Then the product SKU is
7309350764729
Note the product SKU for later.
Integration with GMetri
If you are the admin or a collaborator, then you can configure Shopify integration with GMetri.
From you GMetri homepage, open the experience editor.
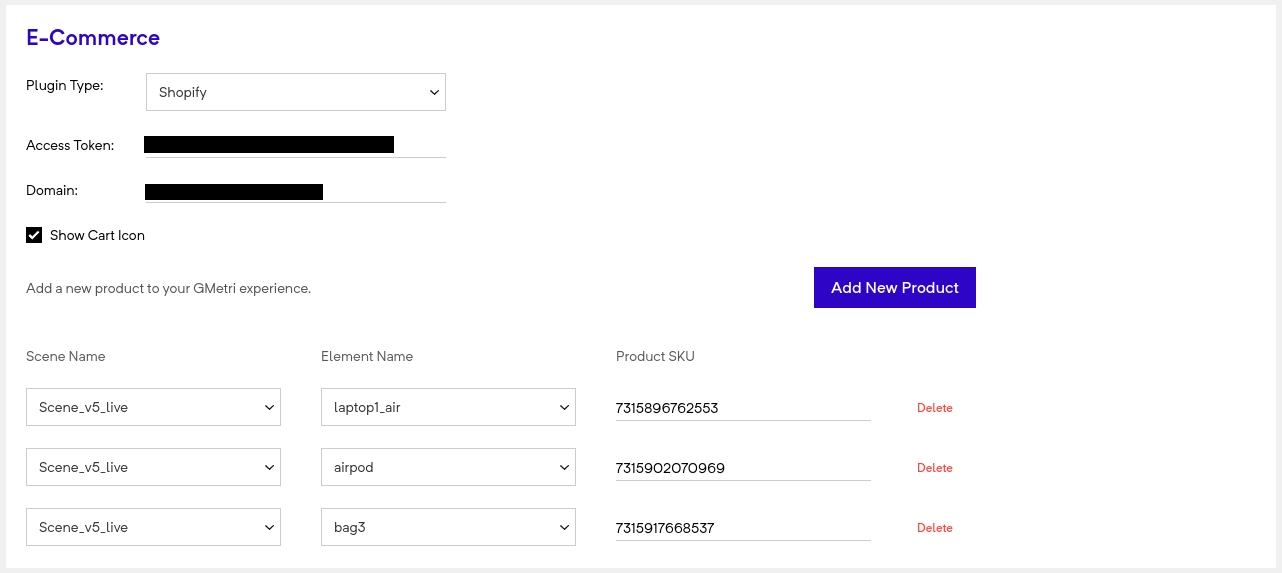
From within the editor, click Settings > E-Commerce > Select
Shopifyfrom the dropdownEnter the Access token noted during Shopify API credentials configuration
Enter the domain name noted during Shopify domain name configuration
Check
Show Cart Iconto enable showing a cart counter and checkout link to the shopify store from within a GMetri experience.
To link shopify products to interactions inside the experience, you need to follow the below steps:
Click on
Add New ProductbuttonSelect a scene from the
Scene Namedropdown. This the scene where the integration will work. Integration can be done with multiple scenes within a single experience.Select an element from the
Element Namedropdown.Enter the Product SKU in the text field next. Ensure that the product SKU is correct.
Above setup will internally create a set of rules to open and pull information for the relevant products from shopify storefront whenever an element is clicked. The resulting rules would read out like so: "When Laptop-Image is clicked, then show product with SKU"
Testing the integration
From your GMetri editor, close the Settings page.
Click on
Playicon on the top right of the page and open a preview linkClick on an element which was selected in the Ecommerce section.
This should open up the product page with information from the shopify store, including pricing details, pictures and variants.
Try adding the product to cart, increase and decrease the quantity of purchase.
Click on
Cart Iconon the top left of the page to goto shopify store and start the payment process.
Last updated
Was this helpful?


