Loading...
Loading...
Loading...
Loading...
Loading...
Loading...
Loading...
Loading...
GMetri supports two web based formats for 3D Models: glb and gltf (v2).
To get the glb/gltf format file for your 3D models you can use 3D softwares like Autodesk 3Ds Max, Autodesk Maya or Blender, using inbuilt exporters or use online converters.
Here are the GMetri guidelines to directly export your models to the gltf v2/glb format:
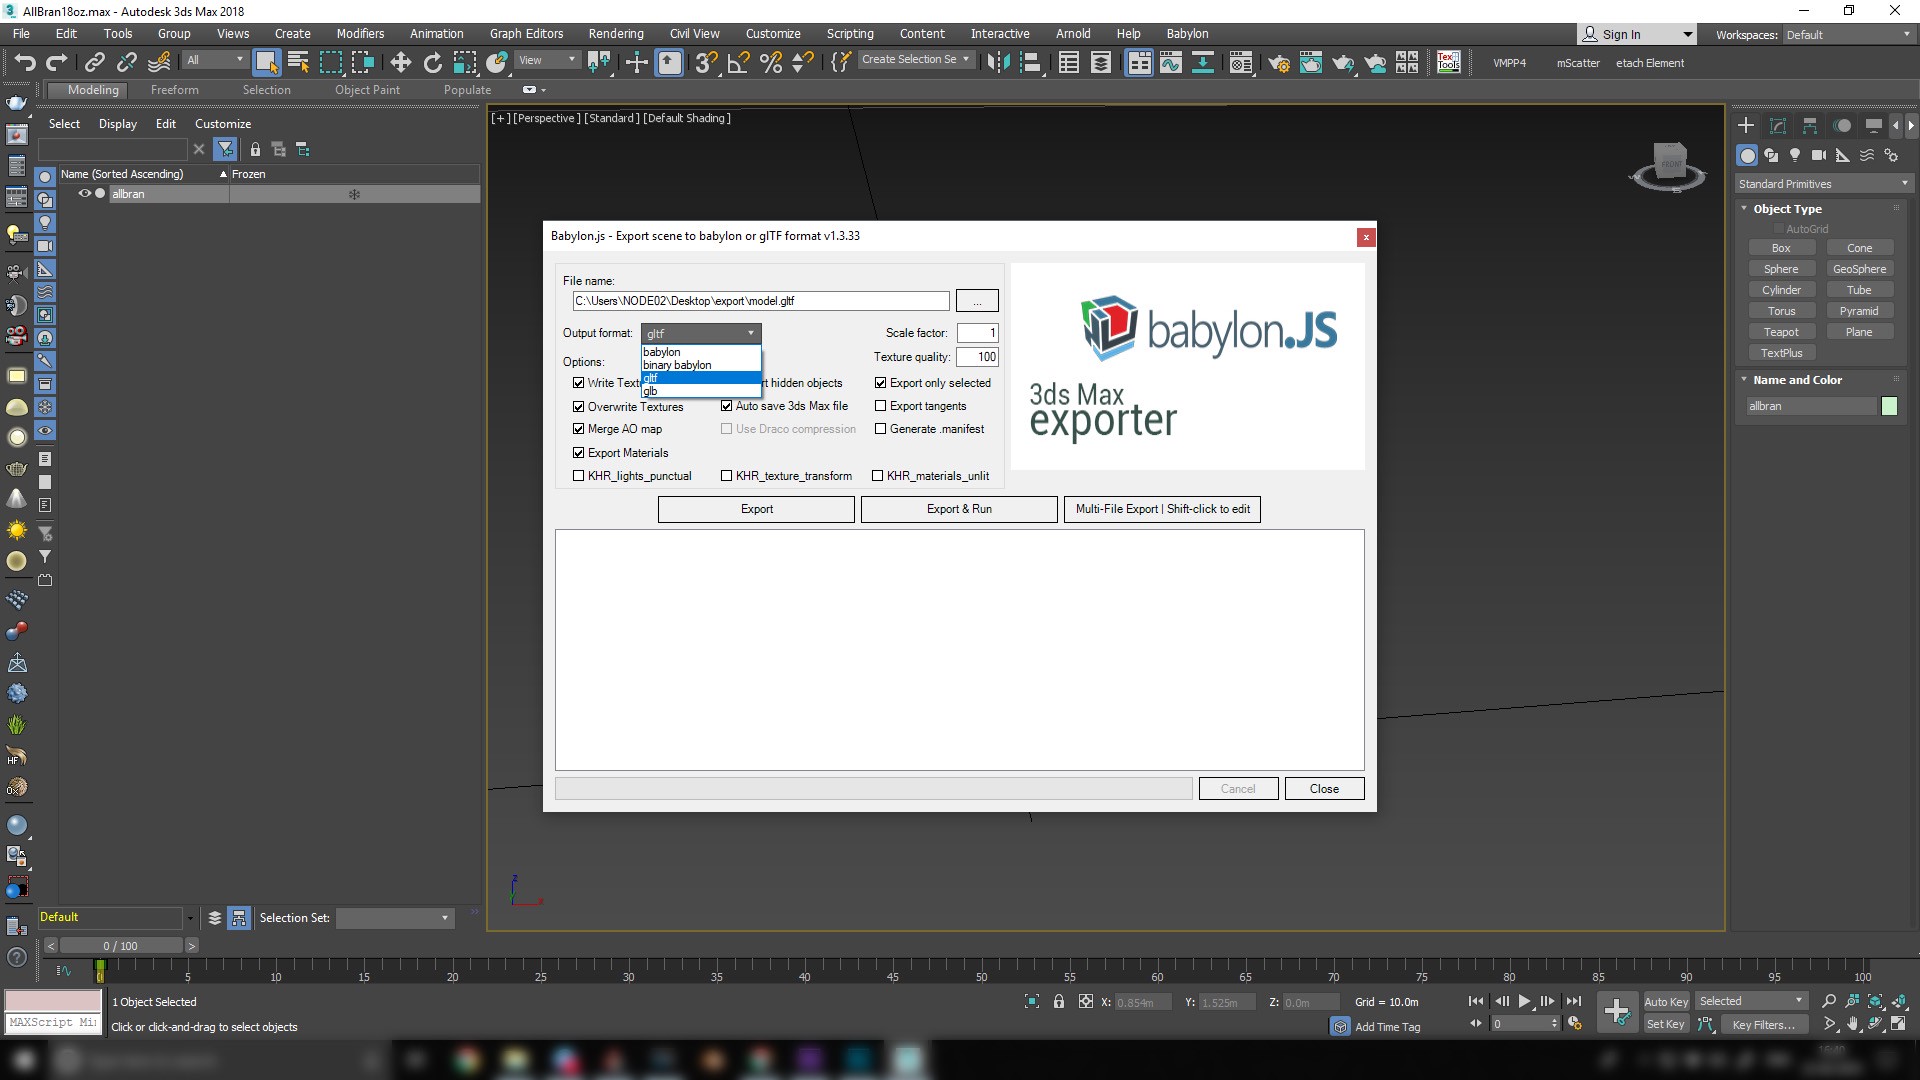
GLTF Models can be exported from the 3D software 3ds Max using a third party script - babylon.js GLTF Exporter.
Here is the complete documentation on the babylon.js exporter for 3ds Max.
After installing babylon.js, a new menu button will appear in your 3ds Max. Clicking on it will bring up this screen.
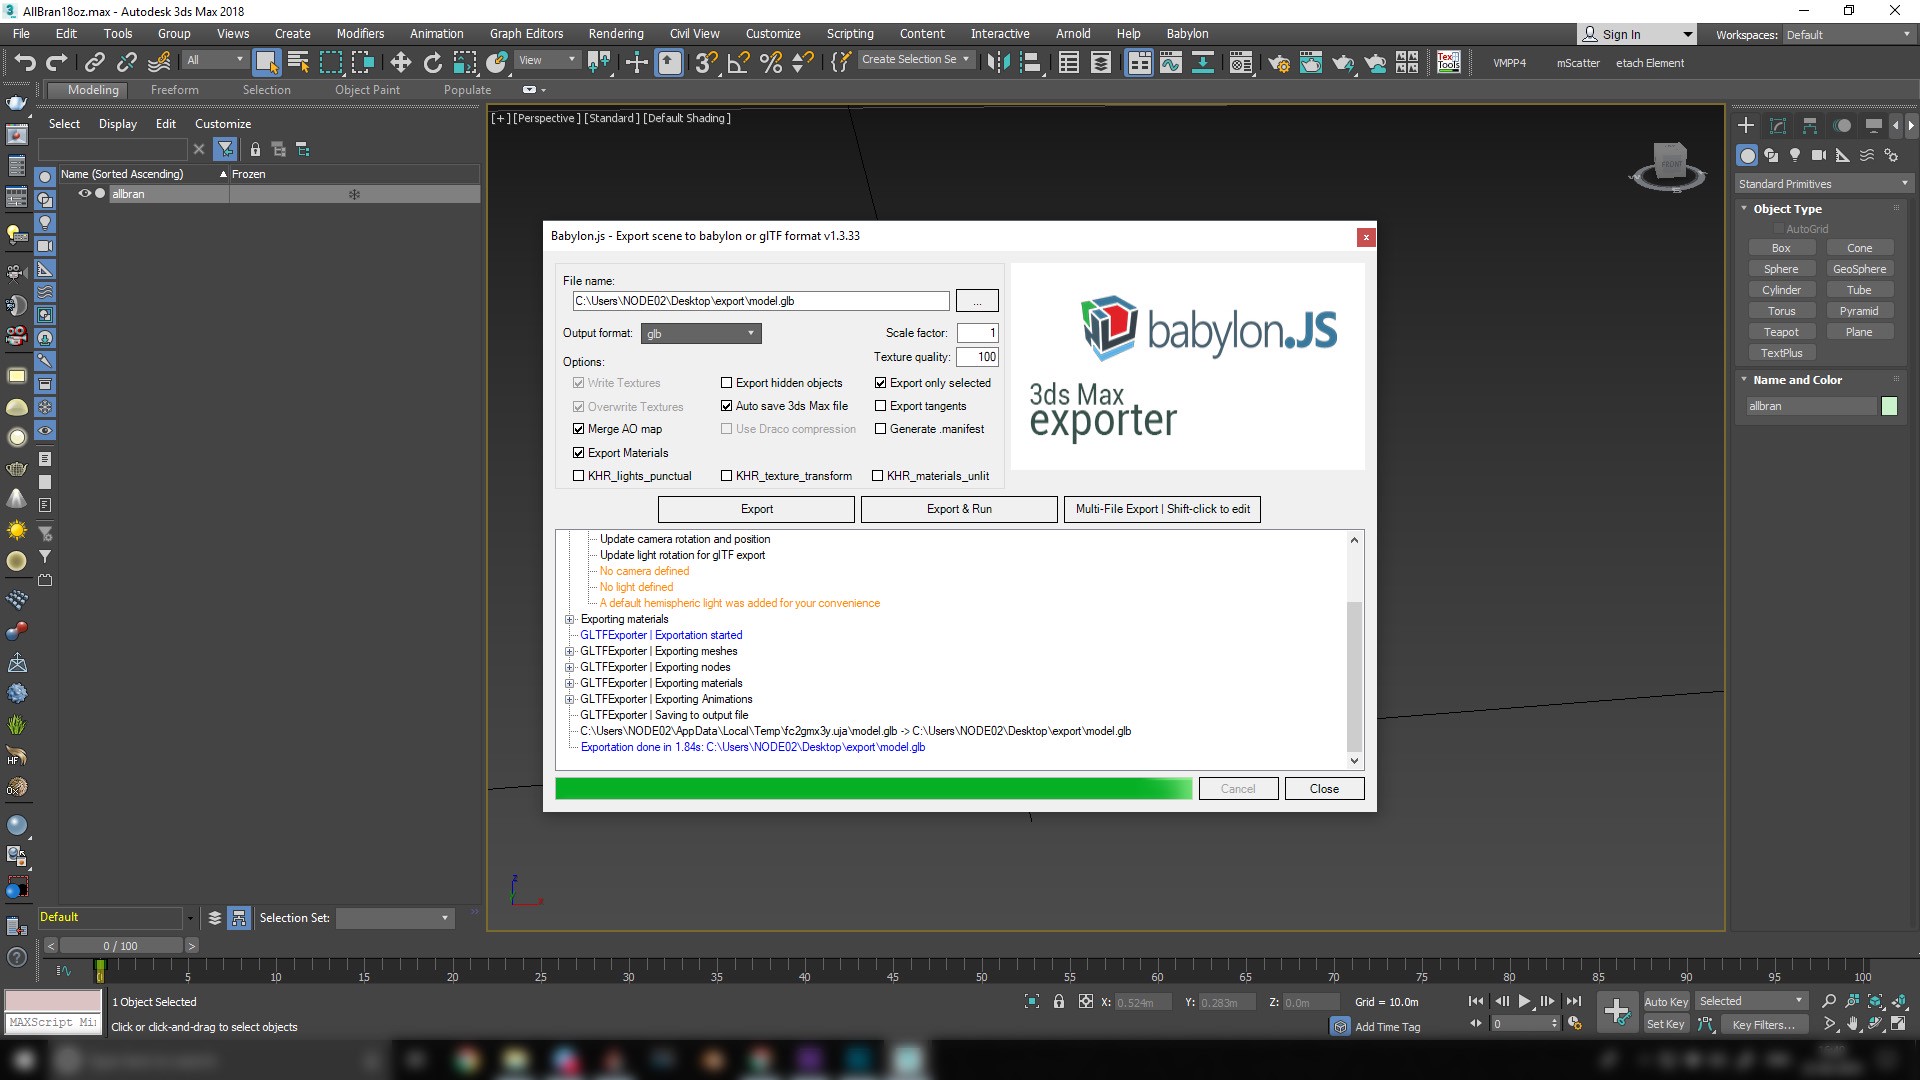
You can export either GLTF/GLB format. The editor supports both formats. Select one format and select your export folder and then click export.
Once export is completed you will get the following message and then you can close the exporter.
GLTF Models can be exported from the 3D software Blender using its inbuilt GLTF Exporter, that can be enabled in User Preferences > Add-ons.
Here is an extended video tutorial on working in Blender to export GLTF Models made by The Khronos Group (makers of GLTF format).
Determining the aspect ratio of images to use ensuring no distortion
Let's say you want to place an image in a 3D Scene - on a wall or on a banner or a TV - how do you know what aspect ratio to use?
You can depend on a property of GMetri - that when you first import an image, GMetri maintains its aspect ratio.
There are a few images in GMetri Assets > Images that are essentially grids - you can use grids to find out the aspect ratio of these walls
These are the good ones:
The steps to measure the aspect ratio of a wall is to place the grid on the wall (align as closely as possible) and then scale it so one side becomes a whole number
For example here for this wall, we placed and scaled it so that the y height = 10
And the corresponding x length happens to be 16.2 (-1 to 15.2) - so you want to use an image with an aspect ratio of 16.2:10 for this wall - something like Eg: 800px x 500px
This ratio happens to be 20:7.4. So you want an image with a resolution like 1000px x 370px
This is of course only true when you want exactly 0 distortion. You can also ballpark it and make minor adjustments to the image element with minor distortion.
360 Panoramic Images can be rendered from a 3D model using the 3D software 3DS Max.
Here is a video tutorial of how to render a scene in 3DS Max using VRay to output an Equirectangular 360 Panoramic Image.
Remember to place the camera at the height of an average human eye height to maintain the scale of the room to real-life.
Listed here are several online repositories where you can find the resources for your Metaverse Experiences.
Shoot your own - GMetri Guidelines.
Popular 360 Cameras:
GoPro Fusion 360
Ricoh Theta V
Samsung Gear 360
Integrated into the GMetri editor:
Flickr - Search and insert directly from your GMetri file manager
GMetri Asset Library - A curated set of assets from GMetri
Free External Repositories:
Paid External Repositories:
Shoot your own with the: -GoPro Fusion 360 -Ricoh Theta V -Samsung Gear 360
Integrated into the GMetri editor: -Flickr - Uncheck "Equirectangular", search and insert directly from your GMetri file manager
Free External Repositories:
Create / Import your own 3D assets:
Integrated into the GMetri editor:
Sketchfab - Search and insert directly from your
Audio can be used for background music and also for voice-overs. Use the following sites to find the right audio for your experience.
Text to Speech: Use the SSML feature on your GMetri Editor
External Resources:
360 images come in multiple formats like equirectangular, cube-map, etc. These images can be converted to the required format using the following link
External Repositories:
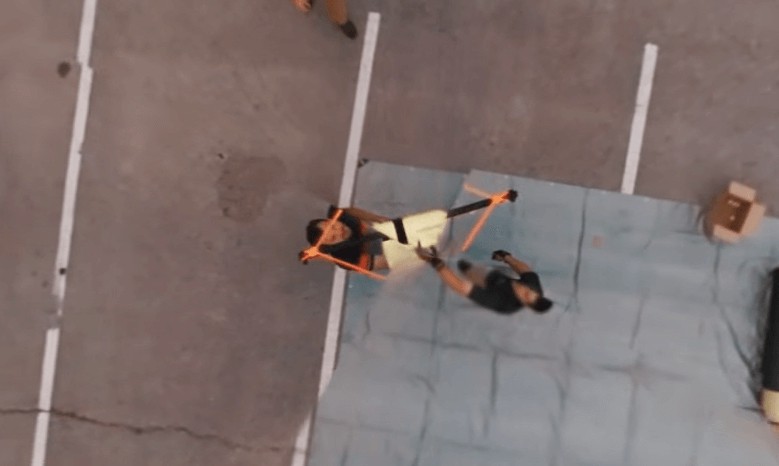
Tripods, Monopods or Drones often leave ghost marks at the bottom of your 360 footage.
Removing tripods can often be tedious, and the simplest way is probably just to cover it up!
Use your logo, or any other image and add it at the bottom in the editor to make your problem disappear. This saves additional work, and is a great way to push in some branding.
However, if you really want to clean up the tripod from your footage completely, here's how you could do that.
Here is a quick tutorial on how to remove the tripod using Adobe Photoshop, Premiere Pro or After Effects:
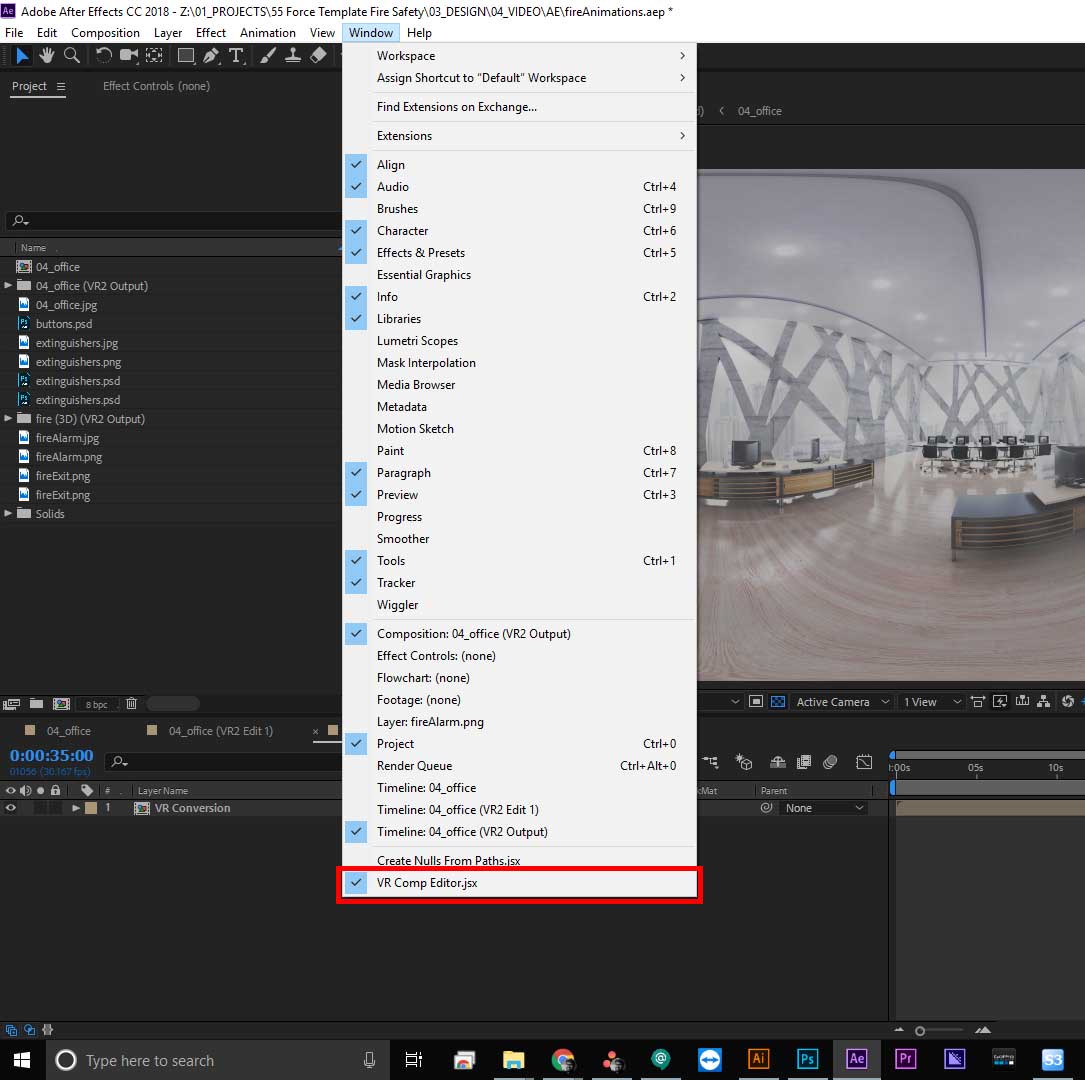
Mettle Sky Box is now a part of the Adobe Suite (>Adobe CC 2018). You can use the same features from the tutorial using the now inbuilt features of After Effects, like this:
Use the "Immersive Video>VR Converter" effect in place of "Mettle Skybox Converter"
Use "Window>VR Comp Editor" instead of "Skybox Composer"
GMetri experiences cannot be run offline currently.
If you are looking for this feature, please contact us.
Snapping 360 Images from Google Street View - is a great article that shows how to hack your way into Google Street View to snap 360 images of your surrounding.
Here are the steps if you have captured a space using Matterport and now want to use it in GMetri:
Use these steps to export a 360 snapshot of the space captured from Matterport https://support.matterport.com/s/article/Download-a-360-Snapshot?language=en_US
Add a "360 Image" element to your scene in GMetri. Go to its properties to change the file in the 360 Image to the one you downloaded from Matterport.
Footage from your GoPro Fusion camera can be stitched and color corrected using GoPro Fusion Studio.
Perform simple color corrections, camera rotation fixes and clip videos all from this software to import into the GMetri editor.
Here's a tutorial on the GoPro Fusion Studio:
Check optimize image file size.
Check optimize video file size.
We can set up the camera view at the beginning of each scene, by accessing the scene properties. You can do this by selecting the scene in the Structure tab and then open up the Properties tab. A scene has the following properties:
Initial Yaw - This determines the initial yaw (horizontal angle) the camera looks when the scene starts
Reset Rotation - Setting this true ensures the camera always follows the "Initial Yaw" setting when entering a new scene, ignoring the direction it was loking at in the previous scene.
For example, if you want the scene to start every time looking 70° to the right, set Initial Yaw to 70° (or -70° for turning left) and switch Reset Rotation "on".
The GMetri platform does not downgrade any images uploaded in any way. If there is any quality variance, it may be due to the camera settings or the export/compression settings. Here are a few things you can try to make sure you get the best quality out of your camera: First, try to zoom out using the editor's zooming feature. If that didn't work,
Ensure your Camera Firmware is up to date
Your Fusion Studio app also needs to be updated
Clean the camera lens before taking pictures to avoid smudges
While exporting from Fusion Studio, you can also adjust the colour settings to make the image look better
If you are compressing your images, there will be a drop in quality. Find the best compression to quality ratio that works for you by trying them out for yourself.
Check Audio AutoStart Limitations.
You can check the guide below: